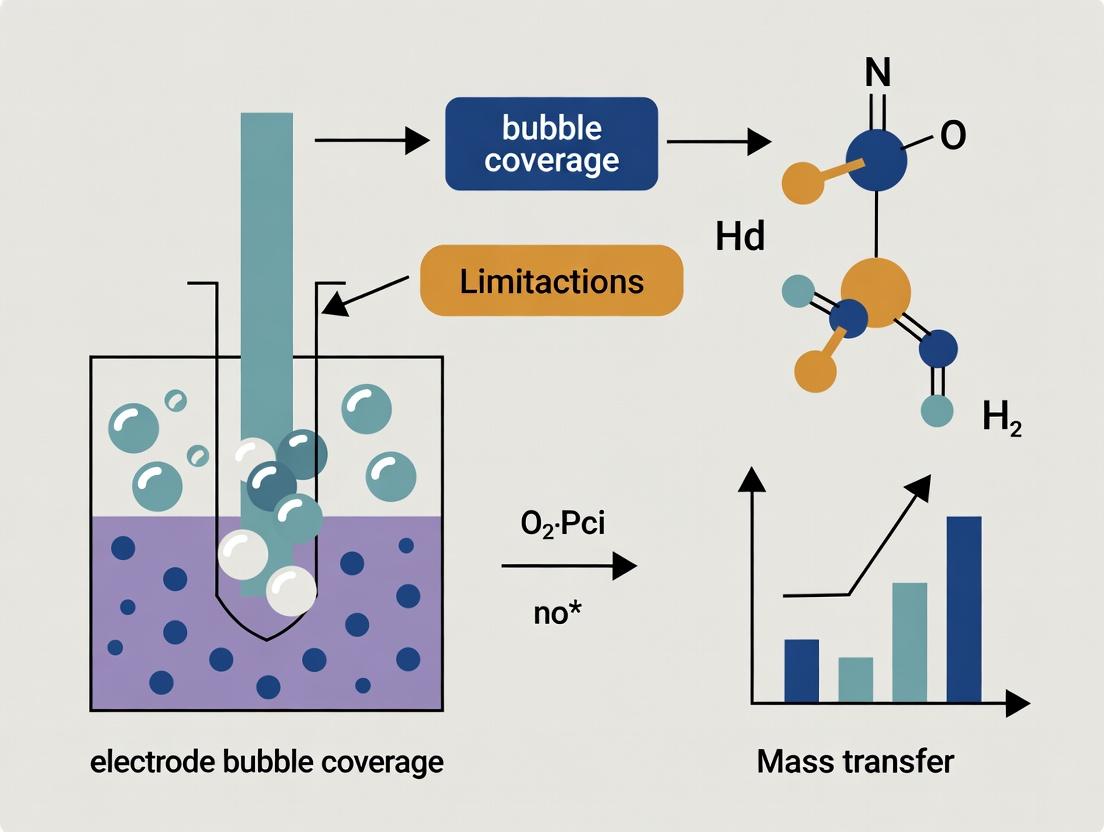
Overcoming Electrode Bubble Coverage Mass Transfer Limitations in Biomedical Electrochemical Systems: Strategies and Solutions for Researchers
This article provides a comprehensive analysis of electrode bubble coverage and its critical impact on mass transfer limitations in biomedical electrochemical applications, such as biosensors, bio-electrosynthesis, and electroporation.
Overcoming Electrode Bubble Coverage Mass Transfer Limitations in Biomedical Electrochemical Systems: Strategies and Solutions for Researchers
Abstract
This article provides a comprehensive analysis of electrode bubble coverage and its critical impact on mass transfer limitations in biomedical electrochemical applications, such as biosensors, bio-electrosynthesis, and electroporation. It systematically explores the fundamental physics of bubble formation and coverage, presents current methodologies for detection and mitigation, offers troubleshooting frameworks for experimental optimization, and validates solutions through comparative analysis of advanced techniques. Designed for researchers, scientists, and drug development professionals, this guide synthesizes cutting-edge research to improve system efficiency, data reproducibility, and device reliability.
Understanding the Physics and Impact of Bubble-Induced Mass Transfer Limitations
Troubleshooting Guides & FAQs
Q1: My electrode shows inconsistent bubble coverage and erratic current during water electrolysis. What could be the cause? A: This is often due to non-uniform electrode surface energy or contamination. The stochastic nature of bubble nucleation leads to uneven coverage. Ensure rigorous electrode pre-treatment: polish sequentially with 1.0 µm, 0.3 µm, and 0.05 µm alumina slurry, followed by ultrasonic cleaning in deionized water and isopropanol for 5 minutes each. Perform cyclic voltammetry (e.g., 50 cycles in 0.5 M H₂SO₄ from -0.2 to 1.2 V vs. Ag/AgCl) to activate and clean the surface in-situ before your main experiment.
Q2: How do I distinguish between discrete bubble growth and a stable gas layer (electrochemically)? A: Monitor the current/voltage noise and overall impedance. Discrete bubble growth shows as periodic, large-amplitude fluctuations in current. A stable gas film manifests as a sustained, high-frequency noise with a dramatic increase in overpotential (>2 V for water splitting) and charge transfer resistance. Use synchronized high-speed imaging (≥1000 fps) and chronoamperometry at constant potential to correlate optical and electrochemical signatures.
Q3: My calculated mass transfer coefficient (kₘ) varies wildly between replicates. How can I improve reproducibility? A: This points to uncontrolled nucleation site density. Implement controlled nucleation by patterning the electrode surface. A reliable protocol involves creating microcavities via laser ablation or depositing a hydrophobic polymer (e.g., PTFE) in a defined array using soft lithography. This standardizes the number and location of nucleation sites, making bubble departure frequency and coverage area more reproducible.
Q4: What is the best method to quantitatively measure bubble coverage (φ) in real-time? A: The consensus method is in-situ optical reflectometry or laser scanning combined with image thresholding. Set up a vertically aligned cell with a high-contrast backlight. Record at 500 fps. Process frames by converting to grayscale, applying a Gaussian blur (σ=2), and using Otsu's method for automatic thresholding to segment bubbles from the electrode. Calculate φ as (bubble pixels / total electrode pixels). Calibrate with known patterns.
Q5: My system forms a stable gas layer too early, blocking all current. How can I delay or prevent this transition? A: Early gas film formation is typically driven by excessive surface hydrophobicity or extreme current density. To delay it: 1) Use pulsed or alternating current waveforms (e.g., 10 ms on, 5 ms off) to allow for bubble detachment during the off-phase. 2) Introduce bulk electrolyte flow (>5 cm/s parallel to the electrode) to exert shear forces. 3) For fundamental studies, consider a slightly inclined electrode (10-15°) to promote buoyancy-driven departure.
Table 1: Characteristic Parameters for Bubble Coverage Regimes
| Regime | Bubble Coverage (φ) | Typical Bubble Diameter (µm) | Current Fluctuation Amplitude (% of mean) | Dominant Mass Transfer Mechanism |
|---|---|---|---|---|
| Discrete Nucleation | 0.1 - 15% | 20 - 500 | 5 - 20% | Diffusion + Convection (micro-stirring) |
| Growth & Coalescence | 15 - 80% | 500 - 2000 | 20 - 60% | Shielded Diffusion, Macro Convection |
| Stable Gas Layer | >95% | N/A (Continuous Film) | >80% (or complete blockage) | Diffusion through thin gas film |
Table 2: Common Techniques for Bubble Coverage Analysis
| Technique | Measured Parameter | Temporal Resolution | Spatial Resolution | Key Limitation |
|---|---|---|---|---|
| High-Speed Imaging | φ, size, shape, frequency | Very High (µs) | High (µm) | 2D projection only |
| Electrochemical Impedance Spectroscopy (EIS) | Effective Electroactive Area | Low (s-min) | None (global) | Model-dependent deconvolution |
| Micro-Laser Scanning | φ, film thickness | High (ms) | Very High (µm) | Complex setup, slow scanning |
| Conductivity Probe Array | Local gas fraction | High (ms) | Low (mm) | Invasive, can disturb flow |
Experimental Protocols
Protocol 1: Synchronized Electrochemical and Optical Measurement of φ
- Cell Setup: Use a three-electrode cell with a flat, vertical working electrode (e.g., 1 cm² Pt foil). Place a high-speed camera perpendicular to the electrode face. Implement backlighting with a diffuse LED panel.
- Procedure: Apply a constant potential (e.g., -1.5 V vs. RHE for H₂ evolution in 1M KOH). Simultaneously trigger chronoamperometry and camera recording (2000 fps) for 10 seconds.
- Analysis: Extract current-time data. For video, process every 100th frame (20 ms interval) using the image analysis pipeline described in FAQ A4 to generate φ(t). Correlate φ(t) with current I(t) to establish I-φ relationship.
Protocol 2: Determining Nucleation Site Density (N_s)
- Pre-treatment: Clean and pattern electrode as described in FAQ A3.
- Experiment: Run electrolysis at low overpotential (low current density, e.g., 10 mA/cm²) for 60 s.
- Imaging: Capture a single high-resolution image of the entire electrode surface at the end of the run.
- Calculation: Count all attached bubbles. Divide the count by the electroactive area (in m²) to obtain N_s (sites/m²). Repeat at different overpotentials to find the dependence.
Visualizations
Diagram 1: Progression of Electrode Bubble Coverage States
Diagram 2: Experimental Workflow for φ-I Correlation
The Scientist's Toolkit: Research Reagent Solutions
Table 3: Essential Materials for Electrode Bubble Coverage Studies
| Item | Function & Rationale | Example Product/Catalog |
|---|---|---|
| Ultra-Flat Conductive Substrates | Provides a uniform, defined surface for reproducible nucleation studies. | Pt-coated silicon wafers, Glassy Carbon disks (5 mm dia.) |
| Micro-patterning Photoresist (e.g., SU-8) | Used with photolithography to create precise hydrophobic/hydrophilic patterns to control nucleation sites. | Kayaku Advanced Materials SU-8 2000 series |
| High-Performance Potentiostat | Enforces precise potential/current control and measures fast transient responses for bubble detachment events. | Biologic SP-300, Metrohm Autolab PGSTAT204 |
| High-Speed Camera | Captures rapid bubble dynamics (nucleation, growth, detachment). Minimum 2000 fps required. | Photron FASTCAM Mini AX, Vision Research Phantom v-series |
| Gas Diffusion Layer (GDL) | For studies on porous electrodes, mimics fuel cell/flow cell conditions where bubble evolution is within pores. | Freudenberg H23, SGL Carbon 39BB |
| Peristaltic Pump w/ Flow Cell | Imposes controlled hydrodynamic flow to study shear effects on bubble coverage and detachment. | Cole-Parmer Masterflex L/S series with acrylic flow cell |
| Image Analysis Software | Quantifies bubble coverage (φ), size, and count from video data. Custom scripting often required. | OpenCV Python library, ImageJ/Fiji with TrackMate plugin |
Technical Support Center
Troubleshooting Guides
Guide 1: Addressing Sudden Current Drop During Potentiostatic Operation
- Problem: A significant and sustained decrease in measured current during an electrochemical experiment under constant applied potential.
- Diagnosis: This is a primary symptom of severe bubble coverage on the working electrode surface. Bubbles physically block active sites, drastically reducing the electroactive area and creating a barrier for reactant species (e.g., H⁺, O₂, organics) to reach the electrode.
- Steps:
- Visual Inspection: Pause the experiment and visually inspect the working electrode. A frosted or "fizzy" appearance indicates adherent bubbles.
- Mechanical Agitation: Gently tap the cell or briefly increase stir rate (if applicable). A transient spike in current followed by a drop confirms bubble fouling.
- Potential Cycling: Apply a short, fast cyclic voltammetry sweep (e.g., -0.5 V to +0.5 V vs. OCP) to induce reductive/oxidative desorption of bubbles.
- Surface Renewal: If steps 2 & 3 fail, carefully remove, polish, and re-prepare the electrode following standard protocol.
Guide 2: Mitigating Unstable Current/Noise in Flow Electrolysis
- Problem: High-frequency noise and unpredictable current fluctuations in a flow cell system.
- Diagnosis: Likely caused by the stochastic nucleation, growth, and release of gas bubbles within the flow channel. This creates fluctuating flow patterns and locally variable mass transfer coefficients.
- Steps:
- Check Back Pressure: Ensure the cell outlet has a small, controlled back pressure (e.g., 0.5-2 bar). This increases bubble solubility and promotes detachment.
- Inspect Flow Distribution: Verify that the flow field design (e.g., serpentine, interdigitated) is not prone to bubble trapping. Use transparent cells for visualization.
- Implement Pulse Operation: Switch from constant potential to a pulsed waveform (e.g., -0.1 V for 1 s, +0.5 V for 0.1 s). The anodic pulse can help oxidatively remove cathodically formed bubbles (like H₂).
- Add Surfactant (Caution): Introduce a minimal concentration of an ionic surfactant (e.g., SDS, CTAB) to reduce gas-electrode surface tension. Note: May interfere with some organic reactants.
Frequently Asked Questions (FAQs)
Q1: How can I quantitatively measure bubble coverage on my electrode during an experiment? A: Direct in-situ measurement is challenging but possible with specialized techniques. The most accessible method is optical microscopy coupled with a transparent electrode (e.g., FTO glass) or a viewing port. Use high-speed imaging and image analysis software (e.g., ImageJ) to calculate percent coverage. For non-transparent systems, electrochemical impedance spectroscopy (EIS) at high frequency can infer the active surface area loss.
Q2: Does increasing stirring speed always solve bubble problems? A: Not always. While increased convection enhances bubble detachment forces, it can also accelerate bubble nucleation by reducing the diffusion layer thickness and locally supersaturating gas. An optimal stir rate exists, beyond which performance may degrade. See Table 1 for data.
Q3: Are some electrode materials more prone to bubble adhesion than others? A: Yes. Bubble adhesion is highly dependent on surface energy and roughness. Hydrophobic surfaces (e.g., PTFE-coated, some carbon materials) exhibit stronger bubble adhesion (high contact angle) leading to larger, more persistent bubbles. Hydrophilic surfaces (e.g., clean gold, platinum oxides) promote smaller, easier-to-detach bubbles.
Q4: What's the simplest experiment to demonstrate the mass transfer effect of bubbles? A: Perform a chronoamperometry (CA) experiment for a well-known outer-sphere redox couple (e.g., 1 mM Ferrocenedimethanol in KCl) under quiescent conditions. Repeat with intentional bubble generation (e.g., by briefly running at a high overpotential for water splitting before the CA step). Compare the steady-state limiting currents.
Data Presentation
Table 1: Impact of Stirring Rate on Bubble Coverage and Mass Transfer Coefficient Data from model experiment: Oxygen Reduction Reaction (ORR) on Pt in 0.1 M KOH.
| Stirring Rate (RPM) | Avg. Bubble Coverage (%) | Calculated kₘ (cm/s) x 10³ | Normalized Current (I/I₀) |
|---|---|---|---|
| 0 (Quiescent) | 45 | 1.2 | 0.55 |
| 200 | 22 | 2.1 | 0.78 |
| 500 | 15 | 2.8 | 0.92 |
| 1000 | 18 | 2.5 | 0.87 |
| 1500 | 25 | 2.0 | 0.75 |
Table 2: Effect of Electrode Hydrophilicity on Bubble Detachment Parameters Comparison for H₂ evolution at -0.8 V vs. Ag/AgCl.
| Electrode Surface Treatment | Water Contact Angle (°) | Avg. Bubble Detach. Radius (µm) | Detachment Frequency (Hz) |
|---|---|---|---|
| As-polished Pt | 65 | 350 | 0.5 |
| Plasma Cleaned Pt | <10 | 120 | 2.1 |
| PTFE-coated C | 130 | 650 | 0.05 |
Experimental Protocols
Protocol A: Quantifying Bubble-Induced Mass Transfer Limitation via Cyclic Voltammetry Objective: To correlate bubble coverage with the decrease in limiting current for a diffusion-controlled reaction.
- Solution: Prepare 5 mM K₃Fe(CN)₆ / 5 mM K₄Fe(CN)₆ in 1.0 M KCl supporting electrolyte. Degas with N₂ for 15 minutes.
- Electrode Setup: Use a standard 3-electrode cell with a Pt disk working electrode (polished), Pt counter, and Ag/AgCl reference.
- Baseline CV: Record 5 cyclic voltammograms at 20 mV/s in the degassed solution under moderate stirring (500 RPM). Use the average cathodic limiting current (I_lim, baseline) as your reference.
- Bubble Generation: Change the solution to 0.5 M H₂SO₄. Apply -1.5 V vs. Ag/AgCl for 60 seconds to generate vigorous H₂ bubbles on the Pt surface.
- Measurement CV: Immediately return to the ferrocyanide solution (no stirring). Record a single CV at 20 mV/s. The cathodic limiting current will be severely suppressed.
- Analysis: Calculate percent mass transfer inhibition as:
[1 - (I_lim, bubbly / I_lim, baseline)] * 100%.
Protocol B: In-situ Optical Measurement of Bubble Coverage Objective: To visually monitor and quantify bubble coverage on a transparent electrode.
- Cell Setup: Use an electrochemical cell with a flat viewing window. Employ a Fluorine-doped Tin Oxide (FTO) glass slide as the working electrode.
- Imaging: Position a high-speed or time-lapse camera focused on the electrode surface. Ensure even backlighting.
- Synchronization: Synchronize the camera trigger with the potentiostat via a TTL pulse at the start of the experiment.
- Experiment: Run a constant potential electrolysis (e.g., -1.2 V for H₂ evolution). Record video at 30-60 fps.
- Image Processing: Export frames. Using software like ImageJ, convert to binary (black & white) by thresholding to distinguish bubbles (dark/light) from the electrode. Calculate
% Coverage = (Bubble Pixels / Total Electrode Pixels) * 100.
Diagrams
Title: Causal Pathway from Overpotential to Current Drop
Title: Troubleshooting Workflow for Suspected Bubble Issues
The Scientist's Toolkit: Research Reagent Solutions
| Item | Function & Relevance to Bubble Research |
|---|---|
| Gas-Diffusion Electrode (GDE) | Electrode with porous, hydrophobic layer. Designed to manage gas transport, forming bubbles in the pore network rather than on the active catalytic surface, thereby minimizing coverage. |
| Ionic Surfactants (e.g., SDS, CTAB) | Reduce the electrolyte-surface tension, lowering the energy for bubble nucleation and detachment. Used to study and mitigate bubble adhesion forces. Caution: Can adsorb on electrodes. |
| Hydrophilic Surface Modifiers (e.g., PEG-SH, Silanes) | Form self-assembled monolayers (SAMs) to create controlled hydrophilic surfaces. Essential for experiments isolating the effect of surface energy on bubble adhesion. |
| Microstructured Electrodes | Electrodes with patterned pits, pillars, or channels. Used to study how topography influences bubble nucleation sites and detachment dynamics. |
| High-Speed Camera (>1000 fps) | Critical for visualizing the rapid dynamics of bubble nucleation, growth, and detachment. Enables quantitative analysis of coverage and residence time. |
| Transparent Conductive Electrodes (FTO, ITO Glass) | Allow for direct in-situ optical observation and quantification of bubble coverage during electrochemical reactions. |
| Back-Pressure Regulator | A simple device attached to a flow cell outlet. Maintaining system pressure increases gas solubility, a key tool for suppressing bubble formation in flow electrolysis. |
Troubleshooting Guide: Electrode Bubble Coverage & Mass Transfer Limitations
Q1: My electrochemical sensor shows high signal noise and drift during long-term culture experiments. What could be the cause and how can I fix it?
A: This is frequently caused by bubble nucleation and coverage on the working electrode surface, which creates inconsistent mass transfer and variable active surface area.
- Troubleshooting Steps:
- Inspect Setup: Confirm electrode is perfectly horizontal to prevent bubble trapping.
- Check Surface: Pre-condition electrode with multiple cyclic voltammetry scans in PBS to ensure clean, hydrophilic surface.
- Modify Protocol: Incorporate a 5-minute nitrogen sparging step for electrolyte solutions to reduce dissolved oxygen, a common bubble source.
- Apply Coating: Use a thin Nafion or agarose gel membrane to homogenize the diffusion layer and physically deter bubble adhesion.
Q2: I observe poor reproducibility in my bio-electrocatalysis experiments (e.g., for enzymatic fuel cells). How can I standardize my electrode preparation to minimize bubble artifacts?
A: Inconsistent bubble coverage directly leads to poor reproducibility by altering the effective electrode area and local substrate concentration.
- Standardized Protocol:
- Polishing: Mechanically polish electrode (e.g., glassy carbon) sequentially with 1.0 µm, 0.3 µm, and 0.05 µm alumina slurry on microcloth pads. Rinse thoroughly with DI water after each step.
- Sonication: Sonicate in isopropanol for 2 minutes, then in DI water for 2 minutes.
- Electrochemical Cleaning: Perform 20 cycles in 0.5 M H₂SO₄ from -0.2 V to +1.2 V (vs. Ag/AgCl) at 100 mV/s.
- Hydrophilicity Check: Measure water contact angle; a consistent angle <15° indicates proper preparation.
- Bubble Mitigation Step: Before each experiment, hold potential at +0.8 V for 60 seconds in your buffer, then gently tap the cell to dislodge any formed bubbles.
Q3: My measured current densities are lower than expected, suggesting reduced efficiency. Could mass transfer limitations from bubble coverage be the issue?
A: Absolutely. Bubble layers act as insulating barriers, dramatically increasing diffusion path length and creating severe mass transfer limitations.
- Diagnosis & Solution:
- Run a Flow Rate Test: Perform your experiment under static conditions and with controlled flow (using a syringe pump or rotational electrode). Compare current densities.
- Data Interpretation: If current increases significantly (>20%) with flow/mixing, your system is mass-transfer limited. Bubbles exacerbate this.
- Implement Forced Convection: Integrate a mini magnetic stirrer (at a constant, low RPM) or use a rotating disk electrode setup. This disrupts bubble attachment and refreshes the diffusion layer.
- Quantify Impact: Use the following table to correlate bubble coverage to efficiency loss:
Table 1: Impact of Simulated Bubble Coverage on Electrode Efficiency
| Bubble Coverage (% of Electrode Area) | Observed Current Density (mA/cm²) | Efficiency Loss vs. Baseline (%) | Recommended Action |
|---|---|---|---|
| 0% (Baseline) | 2.50 ± 0.10 | 0 | Maintain protocol. |
| 10% | 2.15 ± 0.25 | 14 | Check electrolyte degassing. |
| 25% | 1.73 ± 0.40 | 31 | Implement surface coating or stirring. |
| 50% | 1.10 ± 0.55 | 56 | Redesign electrode/cell geometry. |
Q4: Are there specific electrochemical techniques less susceptible to bubble-induced noise and reproducibility issues?
A: Yes. Pulse techniques and those with integrated cleaning steps are more robust.
- Recommended Techniques:
- Chronoamperometry with Pulse Cleaning: Apply your detection potential, but intersperse short, high-potential pulses (e.g., +1.2 V for 200 ms) every 60 seconds to electrochemically clean the surface.
- Square Wave Voltammetry (SWV): SWV's differential current measurement is inherently better at rejecting capacitive and noise artifacts from slowly changing bubble coverage compared to cyclic voltammetry.
- Electrochemical Impedance Spectroscopy (EIS): While sensitive to surface changes, use a low-amplitude perturbation (5-10 mV) and pair it with a Kramers-Kronig test to identify and invalidate data sets corrupted by unstable bubble formation during the frequency sweep.
Experimental Protocol: Quantifying Bubble-Induced Mass Transfer Limitation
Objective: To systematically measure the effect of controlled bubble coverage on the mass transfer coefficient (kₘ) for a model redox couple.
Materials:
- Potentiostat/Galvanostat
- Standard 3-electrode cell (Glassy Carbon WE, Pt CE, Ag/AgCl RE)
- [Fe(CN)₆]³⁻/⁴⁻ (5 mM each) in 1 M KCl supporting electrolyte
- Syringe pump with gastight syringe
- Inert gas (N₂ or Ar) sparging setup
- High-speed camera (optional for coverage validation)
Methodology:
- Electrode Preparation: Follow the standardized polishing and cleaning protocol from Q2.
- Baseline kₘ Measurement:
- Sparge electrolyte with N₂ for 15 min.
- Perform Linear Sweep Voltammetry (LSV) from 0 V to +0.5 V at scan rates from 5 to 100 mV/s.
- Plot limiting current (i_lim) vs. square root of rotation rate (ω^1/2) using a Rotating Disk Electrode (RDE). The slope is used to calculate kₘ via the Levich equation.
- Simulated Bubble Coverage:
- Use a syringe pump to inject precise volumes of air (e.g., 0.5 µL, 1 µL, 2 µL) directly onto the electrode surface under a static electrolyte.
- Allow bubble to settle for 30 seconds.
- Repeat LSV/RDE measurement series with bubble attached.
- Data Analysis:
- Calculate kₘ for each coverage level.
- Correlate % area coverage (from image analysis) with % reduction in kₘ.
The Scientist's Toolkit: Research Reagent Solutions
Table 2: Essential Materials for Mitigating Bubble Artifacts
| Item | Function & Rationale |
|---|---|
| Alumina Polishing Slurry (0.05 µm) | Creates a mirror-finish, reproducible electrode surface, minimizing heterogeneous nucleation sites for bubbles. |
| Nafion Perfluorinated Resin (5% wt. solution) | Forms a hydrophilic, cation-conducting coating that equalizes diffusion and deters bubble adhesion. |
| Pluronic F-127 Surfactant | Non-ionic surfactant added at low concentration (0.01%) to reduce surface tension and bubble stability. |
| Deoxygenation Kit (N₂/Ar gas, sparging stones) | Critical for removing dissolved oxygen, a primary source of bubbles via electrochemical reduction. |
| Potassium Ferricyanide/Ferrocyanide | Standard, reversible redox couple for diagnosing mass transfer limitations and electrode activity. |
| Hydrophobic PTFE Tape | Used to mask specific electrode areas, creating controlled, bubble-free reference zones. |
Visualizations
Bubble Impact on Research Outcomes
Protocol: Quantifying Bubble Mass Transfer Impact
Technical Support Center: Troubleshooting Bubble-Induced Mass Transfer Limitations
This support center is designed within the context of thesis research focused on mitigating electrode bubble coverage to overcome mass transfer limitations in electrochemical systems for bio-electrosynthesis and sensor applications. Below are common issues, detailed protocols, and essential resources.
FAQs & Troubleshooting Guides
Q1: During water electrolysis, my current density drops significantly over time at a fixed potential. What is the primary cause? A: This is typically due to excessive bubble coverage (often oxygen bubbles at the anode) forming an insulating layer. This increases the ohmic resistance and blocks active sites, severely limiting mass transfer of reactants to the electrode surface. First, check your current density against known benchmarks; operating too close to the mass-transport-limited current exacerbates this. Second, inspect electrode wettability; a hydrophobic surface will trap larger bubbles.
Q2: How can I quickly test if electrolyte composition is affecting bubble adhesion and growth? A: Perform a simple comparative chronoamperometry experiment.
- Prepare two identical cells with your standard electrode.
- Use your baseline electrolyte (e.g., 0.5 M K₂SO₄) in Cell A and the modified electrolyte (e.g., with 1 mM SDS surfactant) in Cell B.
- Apply a constant potential (e.g., 1.8 V vs. RHE) for 300 seconds.
- Compare the current stability. A system with better bubble-releasing properties will show a less rapid current decay. Monitor bubble size visually or with a high-speed camera.
Q3: My 3D porous electrode shows uneven reaction distribution, suspected to be due to gas clogging. How do I diagnose this? A: This is a classic issue of internal bubble trapping within electrode geometry. To diagnose:
- Method: Use electrochemical impedance spectroscopy (EIS) at different states of charge/operation.
- Signature: A significant increase in the low-frequency Warburg impedance (45° line) indicates severe mass transport limitation from pore blockage.
- Protocol: Measure EIS from 100 kHz to 0.1 Hz at the open-circuit potential, then after 1 minute and 5 minutes of polarization. The growth of the diffusion tail in the Nyquist plot is indicative of progressive pore blockage.
Q4: What is a definitive experiment to isolate the effect of wettability from geometric effects? A: Create an electrode pair with identical geometry but different wettability.
- Protocol:
- Use two flat, polished stainless-steel electrodes (1 cm²).
- Keep one as-is (moderately hydrophilic).
- Chemically modify the second to be superhydrophobic (e.g., coat with a silane layer).
- Run linear sweep voltammetry (LSV) for hydrogen evolution in 0.5 M H₂SO₄ from 0 V to -1.0 V vs. Ag/AgCl at a slow scan rate (2 mV/s).
- Observe: The superhydrophobic electrode will typically show an earlier onset of visible bubbling but may reach a lower limiting current due to larger, stickier bubbles forming a persistent film. Quantitative bubble coverage data can be extracted from in-situ microscopy.
Experimental Protocols
Protocol 1: Quantifying Bubble Coverage vs. Current Density Objective: To establish the relationship between applied current density and fractional bubble coverage (θ_bubble) on a planar electrode. Method:
- Setup: A transparent electrochemical cell with a planar working electrode (e.g., Pt disk), counter electrode, and reference electrode. A high-speed camera is positioned perpendicular to the electrode surface.
- Procedure:
- Set the potentiostat to galvanostatic mode.
- Apply a series of current densities (e.g., 10, 50, 100, 200 mA/cm²) for a fixed duration (e.g., 120 s each).
- Record the last 5 seconds of video at each step.
- Analysis: Use image processing software (e.g., ImageJ) to binarize the frames and calculate the percentage of electrode area covered by bubbles.
- Expected Output: A table and plot showing θ_bubble increases non-linearly with current density.
Protocol 2: Evaluating Electrolyte Additives on Bubble Dynamics Objective: To test the effect of surfactants or ions on bubble detachment size and frequency. Method:
- Setup: Similar to Protocol 1, with a focus on capturing bubble nucleation and growth at a single site.
- Procedure:
- Use a low current density (5 mA/cm²) to isolate individual bubble events.
- Record the process in baseline electrolyte (1.0 M KOH).
- Repeat with electrolyte containing an additive (e.g., 0.5 mM CTAB, a cationic surfactant).
- Analysis: Measure the bubble detachment diameter and time-to-detachment for >50 bubbles per condition.
- Expected Output: Additives that reduce surface tension (e.g., surfactants) often lead to smaller detachment diameters and faster detachment frequencies.
Data Presentation
Table 1: Impact of Electrode Wettability on Bubble Departure Diameter and Coverage
| Electrode Material & Coating | Contact Angle (°) | Avg. H₂ Bubble Departure Diameter (µm) | Steady-State Bubble Coverage (θ) at 100 mA/cm² | Key Mechanism |
|---|---|---|---|---|
| Pt (Polished) | ~65 (Hydrophilic) | 85 ± 12 | 0.32 ± 0.04 | Smaller bubbles, easier detachment. |
| Carbon Felt (As-is) | ~130 (Hydrophobic) | 1200 ± 250 | 0.78 ± 0.07 | Large, coalesced bubbles trapped in fibers. |
| Pt with TiO₂ Nanotubes | <5 (Superhydrophilic) | 45 ± 8 | 0.11 ± 0.02 | Ultrathin gas film, rapid release. |
| Stainless Steel with PFOS | ~155 (Superhydrophobic) | 95 ± 15 | 0.65 ± 0.05 | Pinning of small bubbles, leading to dense film. |
Table 2: Effect of Electrolyte Composition on Oxygen Evolution Reaction (OER) Overpotential and Gas Coverage
| Electrolyte (1.0 M base) | Additive (10 mM) | OER Overpotential at 10 mA/cm² (mV) | Relative Bubble Coverage (Normalized) | Proposed Effect on Bubble |
|---|---|---|---|---|
| KOH | None | 450 | 1.00 | Baseline, large spherical bubbles. |
| KOH | Na₂SO₄ | 465 | 1.15 | Increased ionic strength, may alter coalescence. |
| KOH | SDS (Anionic Surfactant) | 430 | 0.70 | Lowers surface tension, reduces bubble adhesion. |
| H₂SO₄ | None | 520 | 1.30 | Different anion adsorption, often higher coverage. |
| H₂SO₄ | Triton X-100 (Nonionic) | 480 | 0.60 | Strong wetting agent, promotes slip at interface. |
The Scientist's Toolkit: Key Research Reagent Solutions
| Item | Function/Relevance to Bubble Research |
|---|---|
| Potentiostat/Galvanostat with EIS | For applying precise current/voltage and measuring impedance to diagnose mass transfer limits. |
| High-Speed Camera (>500 fps) | Essential for capturing rapid bubble nucleation, growth, and detachment dynamics. |
| Contact Angle Goniometer | Quantifies electrode wettability (hydrophilicity/hydrophobicity) before and after modification. |
| Surfactants (e.g., SDS, CTAB, Triton X-100) | Used to modify electrolyte surface tension and electrode-electrolyte interfacial energy. |
| Silane Coupling Agents (e.g., Octadecyltrichlorosilane) | For creating stable hydrophobic or superhydrophobic electrode coatings. |
| Plasma Cleaner | To create perfectly clean and reproducibly hydrophilic electrode surfaces. |
| 3D Printed Flow Cell Parts | Enables custom electrode geometry and controlled electrolyte flow to shear away bubbles. |
| ImageJ / MATLAB with Custom Scripts | For analyzing bubble coverage, size, and frequency from video data. |
Visualizations
Diagram 1: Bubble-Induced Mass Transfer Limitation Pathway
Diagram 2: Experimental Workflow for Parameter Optimization
Troubleshooting Guides & FAQs
FAQ: Bubble Formation & Adhesion
Q1: Why do bubbles persistently form and adhere to my working electrode during chronoamperometry? A1: Persistent bubble adhesion is typically due to gas evolution reactions (e.g., O₂ or H₂ from water electrolysis) at the electrode surface, combined with a hydrophobic electrode material or coating. The bubbles act as an insulating layer, dramatically reducing the active electrode area and causing erratic current drops.
Q2: In a flow-through electrochemical cell, bubbles are disrupting the laminar flow and causing noise in my sensor data. How can I mitigate this? A2: Bubbles entrained in the flow create microturbulence and variable mass transfer coefficients. Mitigation strategies include: (1) installing an in-line degasser upstream of the cell, (2) incorporating a hydrophobic PTFE membrane vent downstream of the electrode, or (3) applying a pulsed potentiometric waveform that includes a cleaning step to dislodge bubbles before they grow.
Q3: My optical measurements (e.g., for biofilm studies under electrode polarization) are obscured by bubble clusters. What are my options? A3: Bubble clusters scatter light and create imaging artifacts. Solutions include: (1) Using a transparent Indium Tin Oxide (ITO) working electrode oriented such that bubbles rise away from the imaging plane, (2) introducing a non-ionic surfactant (e.g., 0.01% v/v Triton X-100) to lower surface tension, or (3) employing a microporous glass frit placed above the electrode to guide bubbles out of the optical path.
Troubleshooting Guide: Electrochemical Reactors for Synthesis
Issue: Inconsistent product yield and Faradaic efficiency in a divided H-cell used for CO₂ reduction. Symptoms: Gradual decrease in current over time, accompanied by audible "gurgling" and visible bubble film on the cathode. Root Cause: Bubble coverage on the cathode (e.g., Cu foil) creates a high local pH environment and blocks active sites, diverting the reaction pathway and causing mass transfer limitations for dissolved CO₂. Step-by-Step Resolution:
- Characterize: Perform electrochemical impedance spectroscopy (EIS) at regular intervals. A steady increase in charge-transfer resistance indicates growing bubble coverage.
- Modify Electrode: Switch to a gas diffusion electrode (GDE) configured to allow product gases to evolve from the backside, away from the active catalytic layer interfacing with the electrolyte.
- Modify Geometry: If using a flat electrode, tilt it at a 10-15° angle to promote buoyancy-driven bubble release.
- Operational Fix: Introduce brief, periodic current interruptions (e.g., 0.1 s off every 10 s) to allow bubble disengagement.
Table 1: Impact of Bubble Coverage on Electrochemical Performance
| Experimental Setup | Electrode Material | Bubble Coverage (%) | Current Density Drop (%) | Mass Transfer Coefficient (kₘ) Reduction (%) | Source / Key Parameter |
|---|---|---|---|---|---|
| Static H-Cell (CO₂RR) | Polycrystalline Cu | ~40% (at 2 hr) | 62% | ~75 | J = -10 mA/cm², 0.1 M KHCO₃ |
| Microfluidic Sensor | Pt Microband | ~15% (instant) | 35% (noise ±10%) | N/A | Flow: 10 µL/min, Pulsed Amperometry |
| Water Electrolysis | Iridium Oxide (Ti mesh) | ~60% (steady-state) | 55% (vs. theoretical) | ~50 | 1 M H₂SO₄, 1.8 V |
| Rotating Disk Electrode (RDE) | Glassy Carbon | <5% (at 2000 rpm) | <2% | <5 | Rotation > 1000 rpm prevents adhesion |
Table 2: Efficacy of Bubble Mitigation Strategies
| Strategy | Setup | Result: Bubble Coverage Reduction | Result: kₘ Improvement | Trade-off / Consideration |
|---|---|---|---|---|
| Ultrasonic Agitation (40 kHz) | Batch Reactor | 85% | ~300% | Can damage delicate catalyst films; heats electrolyte. |
| Superhydrophilic Electrode Coating (TiO₂ Nanotubes) | Planar Electrode | 90% | N/A | Long-term coating stability under reduction potentials can be poor. |
| Pulsed Waveform (vs. DC) | Flow Cell | 70% | ~200% | Increases circuit complexity; requires optimization of pulse timing. |
| Substrate Tilt (10°) | H-Cell | 50% | ~80% | Simplest method; effectiveness limited in high gas evolution rates. |
Experimental Protocols
Protocol 1: Quantifying Bubble Coverage via Optical Analysis Objective: To measure the percentage of electrode area obscured by gas bubbles in situ. Materials: Transparent electrochemical cell, ITO working electrode, high-speed camera, image analysis software (e.g., ImageJ, Python OpenCV). Methodology:
- Set up cell with ITO electrode facing the camera. Ensure even backlighting.
- Initiate the electrochemical reaction (e.g., apply reducing potential for CO₂RR).
- Record video at 60-100 fps for the experiment duration.
- Extract frames at regular intervals. Convert to grayscale and apply a binary threshold to distinguish dark bubbles from the electrode.
- Calculate bubble coverage percentage as:
(Bubble Pixel Area / Total Electrode Pixel Area) * 100.
Protocol 2: Evaluating Mass Transfer Limitation via Limiting Current Objective: To determine the effective mass transfer coefficient (kₘ) in the presence of bubble coverage. Materials: Rotating disk electrode (RDE) setup, ferro/ferricyanide redox couple (e.g., 5 mM K₃Fe(CN)₆ in 1 M KCl). Methodology:
- Obtain a baseline by running a linear sweep voltammogram (LSV) from 0.4 V to -0.1 V vs. Ag/AgCl on a clean RDE at a set rotation speed (e.g., 1600 rpm). Record the limiting current (ilimclean).
- Introduce bubble generation by performing water electrolysis at the electrode for a set time (e.g., -1.5 V for 2 minutes) to create adherent bubbles.
- Immediately run the same LSV as in step 1 without stopping rotation. Record the new, lower limiting current (ilimbubbly).
- The mass transfer coefficient is proportional to limiting current. Calculate the relative reduction:
[1 - (i_lim_bubbly / i_lim_clean)] * 100%.
Diagrams
Title: Pathway from Electrolysis to Mass Transfer Limitation
Title: Workflow for Optical Bubble Coverage Analysis
The Scientist's Toolkit: Research Reagent Solutions
| Item | Function & Relevance to Bubble Challenges |
|---|---|
| ITO-Coated Glass Slides | Provide a transparent, conductive working electrode for in-situ optical monitoring of bubble formation and coverage. |
| Gas Diffusion Electrodes (GDEs) | Porous electrodes that separate gas delivery from the electrolyte, allowing evolved gases to exit without covering the catalytic liquid-solid interface. |
| Non-Ionic Surfactants (e.g., Triton X-100, Tween 20) | Reduce electrolyte surface tension to lower bubble adhesion energy and promote detachment. Use at low concentrations to avoid inhibiting electrochemical reactions. |
| Microporous PTFE Membranes | Hydrophobic membranes used as venting interfaces in flow cells to selectively remove gas bubbles from the liquid stream. |
| Rotating Ring-Disk Electrode (RRDE) | The rotating disk (RDE) portion can be used to study bubble-induced mass transfer limits via limiting current, while the ring can monitor solution-phase products. |
| Hydrophilic Nanoparticle Coatings (e.g., SiO₂, TiO₂) | Create superhydrophilic electrode surfaces that resist bubble adhesion, maintaining active area during gas evolution reactions. |
Modern Techniques to Detect, Characterize, and Mitigate Bubble Coverage
Technical Support Center: Troubleshooting & FAQs
Frequently Asked Questions
Q1: During in-situ EIS measurement of bubble-covered electrodes, I observe erratic impedance spectra with poor reproducibility. What could be the cause? A1: This is commonly caused by unstable bubble adhesion and evolution, leading to a dynamically changing electrochemically active surface area (EASA). Ensure your potentiostat's EIS settings are optimized for dynamic systems: use a low sinusoidal perturbation amplitude (e.g., 5-10 mV) to avoid disturbing bubble dynamics, and employ a single-sine measurement with a short integration time per frequency point. For quantifying bubble coverage, synchronize EIS with high-speed imaging, triggering acquisition at the peak of the imaging frame capture.
Q2: My high-speed videos of bubble detachment are blurry, making edge detection for coverage calculation difficult. How can I improve image clarity? A2: Blur is typically due to insufficient shutter speed relative to bubble motion. For bubble detachment studies, a shutter speed of at least 1/50,000 s is recommended. Use a high-intensity, pulsed LED backlight synchronized with the camera shutter to freeze motion. Ensure your optical setup uses a long working distance microscope objective with a narrow aperture (high f-number) to increase depth of field, bringing more of the bubble's curved surface into focus.
Q3: How do I correlate EIS-derived mass transfer resistance (Rmt) with bubble coverage (θb) from imaging in real-time? A3: Implement a synchronized triggering protocol. Use the TTL output from your high-speed camera to send a frame-acquisition signal to the auxiliary input of your potentiostat. The EIS measurement (or a single high-frequency impedance point) should be triggered at a consistent point within each imaging cycle (e.g., at the start of each frame). The data can be correlated post-experiment by aligning timestamps. The charge transfer resistance (Rct) from EIS, fitted using an equivalent circuit, inversely correlates with EASA, which is (1 - θb).
Q4: I am getting inconsistent fitting results when modeling EIS data from a bubbling electrode with a standard Randles circuit. What alternative equivalent circuit should I use? A4: The standard Randles circuit is inadequate for partially blocked electrodes. Use a modified version that accounts for surface heterogeneity. A common effective model is Rs + Q/(Rct + ZW), where Q is a constant phase element (CPE) replacing the double-layer capacitor, and ZW is the Warburg element for diffusion. The CPE exponent 'n' provides insight into surface roughness and bubble coverage uniformity. For severe bubble coverage, consider a dual-layer circuit model representing covered and uncovered surface segments.
Troubleshooting Guides
Issue: Drifting Phase Angle in Low-Frequency EIS Data During Long-Term Bubble Evolution Experiments.
- Check 1: Electrolyte depletion or pH change. Refresh electrolyte or use a larger volume cell with buffer.
- Check 2: Reference electrode stability. Place the reference electrode in a separate, stable compartment connected via a Luggin capillary to minimize bubble-induced potential fluctuations.
- Check 3: Temperature increase from exothermic reactions. Use a thermostated cell and allow system to equilibrate before starting synchronized measurements.
- Protocol: Perform a control EIS experiment without applied overpotential (only bubble generation) to establish a baseline for system drift.
Issue: Poor Synchronization Between EIS and High-Speed Imaging Leading to Data Misalignment.
- Check 1: Latency in trigger signals. Use direct hardware triggers (BNC cables) instead of software commands. Measure signal latency with an oscilloscope.
- Check 2: Incorrect sampling rates. The EIS sampling rate (for single-frequency tracking) must be an integer multiple or divisor of the camera's frame rate.
- Protocol:
- Generate a square wave pulse from a function generator (e.g., 10 Hz).
- Split the signal to simultaneously trigger the camera and the potentiostat's auxiliary input.
- Record the response of both systems to this known signal to quantify and correct for any fixed time offset in your analysis software.
Issue: Inaccurate Bubble Coverage Calculation from Image Analysis Due to Reflection/Refraction Artifacts.
- Check 1: Non-uniform illumination causing shadows. Implement diffuse backlighting using a frosted glass diffuser.
- Check 2: Optical distortion from the cell window. Use a flat, anti-reflection coated optical window and ensure it is perpendicular to the imaging axis.
- Protocol for Image Analysis:
- Capture a static background image with no bubbles at the start.
- For each video frame, subtract the background image.
- Apply a dynamic thresholding algorithm (e.g., Otsu's method) to the contrast-enhanced image to create a binary mask.
- Use morphological operations (opening/closing) to remove noise.
- Calculate coverage (θ_b) as (Total Pixels of Bubble Mask) / (Total Pixels of Electrode Region of Interest).
Table 1: Typical EIS Parameters for Bubble-Covered Electrodes in Common Systems
| Electrolyte System | Bubble Type | Typical Coverage (θ_b) Range | Frequency Range for EIS | Key Fitted Parameter (Low Cov.) | Key Fitted Parameter (High Cov.) | Mass Transfer Resistance (R_mt) Change |
|---|---|---|---|---|---|---|
| 0.5 M H₂SO₄ (OER) | O₂ | 5%-40% | 100 kHz - 100 mHz | R_ct: 10-50 Ω·cm² | R_ct: 50-200 Ω·cm² | Increases 3-5x |
| 1 M KOH (HER) | H₂ | 10%-60% | 10 kHz - 50 mHz | CPE-P: 0.9-0.95 | CPE-P: 0.7-0.8 | Increases 5-10x |
| PBS Buffer (Bio-reactions) | CO₂/O₂ | 2%-20% | 1 MHz - 1 Hz | R_s: ~30 Ω·cm² | R_s: ~35 Ω·cm² (fluctuating) | Increases 1.5-2x |
Table 2: High-Speed Imaging Specifications for Bubble Dynamics
| Bubble Size Range | Recommended Frame Rate | Minimum Shutter Speed | Resolution Requirement | Lighting Type | Analysis Method |
|---|---|---|---|---|---|
| 10 - 100 μm | 1,000 - 5,000 fps | 1/100,000 s | 1024x1024 px | Pulsed LED Backlight | Thresholding, Edge Detection |
| 100 - 1000 μm | 500 - 2,000 fps | 1/50,000 s | 1280x800 px | High-Speed LED Array | Grey-scale Correlation, AI Segmentation |
| > 1 mm | 100 - 500 fps | 1/10,000 s | 1920x1080 px | Diffuse Cold Light | Background Subtraction, Perimeter Tracing |
Detailed Experimental Protocols
Protocol 1: Synchronized EIS and High-Speed Imaging for Bubble Coverage Analysis. Objective: To quantitatively correlate electrochemical impedance with real-time bubble coverage on an electrode.
- Cell Setup: Use a transparent electrochemical cell (e.g., with a quartz window). Position the working electrode (e.g., Pt disk) facing the window. Place counter and reference electrodes to minimize interference with the imaging path.
- Optical Setup: Mount a high-speed camera with a macro lens or long-distance microscope perpendicular to the electrode surface. Install a high-power, pulsed LED light source for backlighting. Synchronize the LED pulse with the camera exposure.
- Electrical Setup: Connect the potentiostat. In the software, configure a hybrid experiment: a constant DC potential (or current) to generate bubbles, superimposed with a multi-sine or fast single-frequency AC signal for impedance tracking.
- Synchronization: Connect the camera's frame-exposure output to the potentiostat's analog/digital input. Configure the potentiostat to record one impedance data point (e.g., at 1 kHz) per received trigger pulse.
- Execution: Start imaging acquisition, immediately followed by initiating the electrochemical protocol. Record for a set duration (e.g., 60 s).
- Data Processing: Extract the time-series impedance magnitude (|Z|) and phase. Process video to calculate θ_b(t) for each frame. Align the two datasets using the shared trigger timestamps.
Protocol 2: EIS Equivalent Circuit Fitting for Partially Bubble-Blocked Electrodes. Objective: To extract meaningful electrochemical parameters from EIS data of an electrode with evolving bubble coverage.
- Data Acquisition: Perform a full-frequency EIS scan (e.g., 100 kHz to 0.1 Hz) at a specific time point during bubble growth. Use a low AC amplitude.
- Model Selection: In your fitting software (e.g., ZView, EC-Lab), use a modified Randles circuit: Rs([Q(Rct[Z_W])]). For highly non-ideal surfaces, use a circuit with two parallel (R-CPE) branches representing active and blocked areas.
- Initial Parameters: Provide sensible initial guesses: Rs from high-frequency intercept, Rct from diameter of the high-frequency semicircle, Q from the semicircle's shape.
- Fitting Constraints: Constrain the CPE exponent 'n' between 0.7 (highly disordered/blocked) and 1 (perfect capacitor). The Warburg coefficient can be linked to the estimated diffusion coefficient.
- Validation: Check the goodness of fit (χ²) and error distribution on residuals. The fitted Rct should correlate inversely with the simultaneously measured clear electrode area (1 - θb).
Diagrams
Title: Synchronized EIS & Imaging Workflow
Title: Bubble Coverage Impact on Mass Transfer Pathway
The Scientist's Toolkit: Research Reagent Solutions & Essential Materials
| Item | Function & Rationale |
|---|---|
| Potentiostat/Galvanostat with FRA | The core instrument for applying potential/current and measuring impedance. A built-in Frequency Response Analyzer (FRA) is essential for accurate EIS. Key for applying the small AC perturbation. |
| High-Speed Camera (≥ 1000 fps) | Captures rapid bubble nucleation, growth, and detachment events. Essential for quantifying time-resolved bubble coverage (θ_b). Global shutter models are preferred to avoid motion distortion. |
| Pulsed High-Power LED Light | Provides intense, brief illumination synchronized with the camera shutter to "freeze" fast-moving bubbles, eliminating motion blur for precise image analysis. |
| Transparent Electrochemical Cell (Quartz) | Allows optical access to the electrode surface. Quartz provides excellent transmission for visible light and chemical inertness. Must have ports for electrodes and gas management. |
| Luggin Capillary | Isolates the reference electrode from the working electrode compartment, minimizing IR drop and shielding the reference from bubble-induced potential fluctuations. Critical for stable EIS measurements. |
| Constant Phase Element (CPE) Fitting Software | Software capable of fitting non-ideal impedance elements (like ZView, EC-Lab, or equivalent). Necessary for accurate modeling of the heterogeneous surface caused by bubble coverage. |
| Image Analysis Software (e.g., ImageJ, Python/OpenCV) | For batch processing high-speed video frames: performing background subtraction, thresholding, and pixel counting to calculate bubble coverage (θ_b) over time. |
| Synchronization Hardware (BNC Cables, Function Gen.) | Cables and a function generator to create and transmit precise trigger signals between the camera, light source, and potentiostat, ensuring temporal alignment of optical and electrochemical data. |
Technical Support Center
Troubleshooting Guides & FAQs
FAQ 1: Flow-Through Cell Operation
- Q: I am observing inconsistent electrochemical signals despite constant flow rates. What could be the cause?
- A: Inconsistent signals often point to bubble nucleation or adherence on the electrode surface, disrupting laminar flow and creating variable mass transfer conditions. First, verify that your flow system is thoroughly degassed prior to operation. Use a degassing module or sparge buffers with an inert gas (e.g., Ar, N₂) for 20-30 minutes. Second, ensure all fittings are airtight; even small leaks can introduce bubbles. Third, inspect the cell inlet geometry. A frit or mesh distributor upstream of the electrode can help establish a more uniform flow profile and prevent jet-induced bubble formation.
FAQ 2: Ultrasonic Agitation
- Q: Ultrasonic bath application causes my working electrode to detach or my solution temperature to rise significantly. How can I mitigate this?
- A: Ultrasonic cavitation generates intense localized energy. To prevent detachment, use a mechanical clamp or adhesive specifically rated for ultrasonic environments. To control temperature, employ a pulsed ultrasonic protocol (e.g., 5 seconds ON, 15 seconds OFF) instead of continuous waves. Place the reaction vessel in a secondary water bath within the ultrasonic cleaner to dissipate heat. Always monitor solution temperature with a calibrated thermometer.
FAQ 3: Pulsed Potential Techniques
- Q: When applying pulsed potentials for bubble dislodgment, my background current increases over time. Is this normal?
- A: A steadily increasing background current is not typical and suggests surface fouling or modification. The pulsed waveform may be causing unintended Faradaic reactions or accelerating electrolyte decomposition. Review your pulse parameters (amplitude, frequency, duty cycle). Avoid anodic pulses that exceed the solvent/electrolyte oxidation potential. Characterize your electrode surface via microscopy or impedance spectroscopy before and after prolonged pulsing to check for damage.
Quantitative Data Summary
Table 1: Comparison of Active Bubble Removal Strategies
| Strategy | Typical Operational Parameters | Efficacy (% Bubble Coverage Reduction)* | Key Limitations |
|---|---|---|---|
| Flow-Through Cells | Flow Rate: 1-10 mL/min; Channel Height: 0.5-2 mm | 70-90% | Shear stress may affect delicate films; requires bulk solution. |
| Ultrasonic Agitation | Frequency: 40-80 kHz; Power: 50-200 W; Mode: Pulsed | 60-85% | Local heating; may damage sensitive electrode materials. |
| Pulsed Potentials | Amplitude: ±0.5-2 V vs. OCP; Frequency: 10-100 Hz; Duty Cycle: 10-50% | 50-80% | Risk of parasitic reactions and surface oxidation/reduction. |
*Efficacy is highly dependent on specific system geometry, electrolyte, and bubble size. Data synthesized from recent literature.
Experimental Protocols
Protocol 1: Evaluating Flow Rate Efficacy on Bubble Coverage
- Setup: Install a polished glassy carbon working electrode in a rectangular flow cell with a known channel geometry.
- Bubble Generation: Induce consistent H₂ or O₂ bubbles via a controlled potentiostatic step (e.g., -1.2 V or +1.8 V vs. Ag/AgCl) for 60 seconds in a 0.1 M KCl solution.
- Imaging: Use a high-speed camera mounted on a microscope to record the electrode surface.
- Flow Application: Initiate flow using a calibrated syringe pump at rates from 0.5 to 10 mL/min. Record for 120 seconds after flow initiation.
- Analysis: Use image analysis software (e.g., ImageJ) to calculate bubble coverage (%) over time. Plot coverage vs. time for each flow rate.
Protocol 2: Optimized Pulsed Potential Routine for Bubble Dislodgment
- Setup: Configure a potentiostat for a custom waveform. Use a standard three-electrode setup in a quiescent solution.
- Bubble Formation: Generate a consistent bubble layer as in Protocol 1, Step 2.
- Pulse Application: Apply a symmetric square wave pulse. Start parameters: ±1.0 V vs. Open Circuit Potential (OCP), 50 Hz frequency, 20% duty cycle (cathodic pulse). Duration: 30 seconds.
- Measurement: Monitor current transient. Use the camera to observe bubble detachment.
- Iteration: Systematically vary amplitude (±0.5 V to ±2.0 V) and frequency (1 Hz to 1 kHz). For each condition, record the time required for >80% bubble coverage reduction.
Visualizations
Title: Pulsed Potential Bubble Removal Mechanism
Title: Strategy Selection Logic for Bubble Removal
The Scientist's Toolkit: Research Reagent Solutions
Table 2: Essential Materials for Bubble Mitigation Experiments
| Item | Function & Specification |
|---|---|
| Degassing Module | Removes dissolved gases from electrolyte streams to prevent in-situ bubble nucleation. Look for <1 ppm O₂ capability. |
| Peristaltic or Syringe Pump | Provides precise, pulse-free flow for flow-cell studies. Calibrate regularly for accurate volumetric rates. |
| Piezoelectric Ultrasonic Transducer | Generates high-frequency sound waves for cavitation-induced bubble dislodgment. Select frequency based on bubble resonance size. |
| Potentiostat with Arbitrary Waveform | Essential for generating custom pulsed potential profiles (square, sine, asymmetric). Requires high current output for fast transients. |
| High-Speed CMOS Camera | For visualizing bubble dynamics (nucleation, growth, detachment). >500 fps is typically necessary. |
| Microscope with Long Working Distance Objective | Enables clear visualization of the electrode-liquid interface at micron-scale resolution. |
| Sparging Gas (Argon/Nitrogen) | Inert gas used to purge oxygen from electrochemical cells, reducing bubble formation from competing redox reactions. |
Technical Support Center: Troubleshooting & FAQs
Thesis Context: This support content is framed within research focused on mitigating mass transfer limitations in electrochemical systems (e.g., electrolyzers, fuel cells, biosensors) caused by gas bubble coverage on electrodes. The solutions explored involve surface engineering to manage bubble adhesion and release.
Frequently Asked Questions (FAQs)
Q1: Our superhydrophilic coating is delaminating from the electrode substrate during long-term electrolysis. What could be the cause and solution?
A: Delamination is typically an adhesion failure. Common causes and fixes:
- Cause 1: Inadequate Surface Preparation. Residual organic contaminants or oxides prevent strong bonding.
- Solution: Implement a rigorous cleaning protocol: sonicate sequentially in acetone, isopropanol, and deionized water for 15 minutes each. For metal substrates, use a 1M H₂SO₄ etch or an O₂ plasma treatment for 2-5 minutes immediately before coating.
- Cause 2: Coating Curing/Processing Incompatibility. Thermal stress from mismatched thermal expansion coefficients.
- Solution: Use a graded curing process. For silica-based sol-gels, initial drying at 80°C for 1 hour, followed by a slow ramp (2°C/min) to the final annealing temperature (e.g., 450°C for TiO₂). Verify substrate tolerance.
- Cause 3: Chemical Attack of the Interface.
- Solution: Apply a chemically compatible adhesive interlayer. For noble metal electrodes, a thin (5-10 nm) Cr or Ti adhesion layer deposited via sputtering can improve coating stability.
Q2: We observe non-uniform current distribution across our porous electrode, leading to localized bubble "hot spots." How can we improve homogeneity?
A: This indicates a mass transport or conductivity limitation within the porous structure.
- Diagnostic Step: Perform electrode potential mapping using a miniature reference probe or IR thermography to identify dead zones.
- Primary Solution: Gradient Pore Structure Design. Fabricate or source electrodes with a pore size gradient. The side facing the electrolyte should have smaller pores (e.g., 5-10 µm) to maximize surface area and nucleation sites, while the bulk/backside should have larger, interconnected pores (50-200 µm) to act as bubble transport channels.
- Secondary Solution: Integrated Current Collector. Ensure the porous electrode is in intimate contact with a low-resistance, corrosion-resistant current collector (e.g., Ti or Au-plated mesh). Apply uniform pressure during cell assembly.
Q3: Our catalyst layer cracks upon drying, exposing the underlying substrate. How can we achieve a crack-free, durable layer?
A: Cracking is due to tensile stress from capillary forces during solvent evaporation.
- Solution: Modify the Ink Formulation and Drying Process.
- Add Binder/Polymer: Incorporate a ion-conducting polymer (e.g., Nafion for PEM applications) or a polymeric binder (e.g., PVDF) at 5-15 wt% to provide mechanical integrity.
- Use Solvent Mixtures: Employ a mixture of high and low boiling point solvents (e.g., water/iso-propanol/1-butanol) to slow down and control the drying rate.
- Control Drying Environment: Dry the coated electrode in a controlled humidity chamber (≥50% RH) at room temperature for 1 hour before final oven drying. This slows evaporation kinetics.
Q4: How do we quantitatively compare the bubble release performance of different engineered surfaces?
A: You need to measure key bubble dynamics parameters. Below is a standard protocol.
Experimental Protocol: Quantifying Bubble Release Behavior
Objective: To measure bubble departure diameter and detachment frequency on different electrode surfaces under controlled potentiostatic conditions.
Materials:
- Electrochemical cell with viewing window
- High-speed camera (≥500 fps)
- Microscope lens for magnification
- Potentiostat/Galvanostat
- Substrates: 1) Bare electrode (control), 2) Superhydrophilic coated electrode, 3) Electrode with porous catalyst layer.
- Electrolyte: 0.5 M H₂SO₄ or 1 M KOH (deaerated with N₂ for 30 min prior).
Procedure:
- Mount the electrode vertically or at a slight angle (5-10°) to assist bubble release. Connect as the working electrode.
- Place the cell, fill with electrolyte, and assemble the counter and reference electrodes.
- Position the high-speed camera perpendicular to the electrode surface. Ensure even, diffuse backlighting.
- Apply a constant current density (e.g., 50 mA/cm²) to generate H₂ or O₂ bubbles.
- Record 5-10 videos of 10-second duration each at 500-1000 fps at a fixed location.
- Use image analysis software (e.g., ImageJ, MATLAB) to track individual bubbles from nucleation to detachment.
- For each surface, measure ≥100 bubbles to calculate:
- Average Bubble Departure Diameter (µm)
- Bubble Detachment Frequency (Hz)
- Surface Bubble Coverage Fraction (%).
Quantitative Data Summary
Table 1: Comparative Performance of Engineered Surfaces for Hydrogen Bubble Release (1 M KOH, 50 mA/cm²)
| Surface Type | Avg. Departure Diameter (µm) | Avg. Detachment Frequency (Hz) | Avg. Bubble Coverage (%) | Notes |
|---|---|---|---|---|
| Polished Pt (Control) | 125 ± 35 | 8.5 ± 2.1 | 32 ± 8 | Large, sporadic detachment |
| TiO₂ Nanotube Superhydrophilic | 45 ± 12 | 25.3 ± 5.6 | 11 ± 4 | Small, rapid detachment |
| Ni Foam Porous Electrode | N/A (Coalesces) | N/A (Continuous flow) | 5 ± 2 | Bubbles coalesce and channel out |
| Structured Catalyst Layer (Pt/C+Nafion) | 68 ± 18 | 18.7 ± 4.3 | 19 ± 6 | Improved over control |
Table 2: Common Research Reagent Solutions & Materials
| Item Name | Function/Benefit | Typical Specification/Example |
|---|---|---|
| Titanium Isopropoxide (TTIP) | Precursor for TiO₂ sol-gel superhydrophilic coatings. Forms highly porous, hydrophilic oxide layers. | 97% purity, used in ethanol/acid catalyzed sol-gel. |
| Nafion Perfluorinated Resin | Ionomer binder for catalyst layers. Provides proton conductivity and mechanical stability in PEM environments. | 5 wt% solution in lower aliphatic alcohols/water. |
| Chloroplatinic Acid (H₂PtCl₆) | Precursor for Pt catalyst deposition via electroplating or thermal decomposition. | 8 wt% in H₂O. |
| Nickel Foam | High-surface-area, porous electrode substrate. Facilitates bulk gas transport away from active sites. | Porosity >95%, PPI (pores per inch) 80-110. |
| (3-Aminopropyl)triethoxysilane (APTES) | Silane coupling agent. Improves adhesion of coatings to oxide surfaces via siloxane bonds. | ≥98%, used for surface functionalization. |
| Polyvinylidene Fluoride (PVDF) | Hydrophobic binder for electrode fabrication in alkaline environments. Provides chemical resistance. | Powder, MW ~534,000, dissolved in N-Methyl-2-pyrrolidone (NMP). |
Workflow Diagrams
Title: Troubleshooting Workflow for Bubble-Induced Mass Transfer Issues
Title: Experimental Protocol for Bubble Dynamics Measurement
Technical Support Center: Troubleshooting and FAQs
This support center is designed for researchers working on overcoming electrode bubble coverage mass transfer limitations, utilizing microfluidic platforms and rotating electrode systems. The following guides address common experimental challenges.
Frequently Asked Questions (FAQs)
Q1: During chronoamperometry in my rotating electrode system, I observe periodic current spikes followed by dips. What is the cause? A1: This pattern is indicative of transient bubble adhesion and release on the electrode surface. Bubbles formed from gas evolution reactions (e.g., O₂ or H₂) periodically cover active sites, reducing the effective area and causing mass transfer limitations. Implement in situ optical monitoring to correlate current signatures with visual bubble coverage. Increasing rotation speed can enhance shear forces to detach bubbles more consistently.
Q2: My microfluidic electrochemical cell shows non-uniform current density across the electrode, particularly at low flow rates. How can I address this? A2: Non-uniformity at low flow rates (< 50 µL/min) is often due to laminar flow profile dominance and bubble trapping in dead zones. This exacerbates mass transfer limitations. Redesign the flow channel geometry to incorporate herringbone or staggered herringbone mixers to induce chaotic advection. Ensure the electrode is positioned downstream of a flow-focusing inlet to stabilize the electrolyte stream.
Q3: What is the optimal rotation speed for a Rotating Disk Electrode (RDE) to minimize bubble coverage without causing hydrodynamic instability? A3: The optimal speed balances bubble removal and stable laminar flow. For aqueous solutions, a range of 1000-2500 rpm is typically effective. However, for viscous or gas-saturated electrolytes, you must calculate the dimensionless Reynolds (Re) and Weber (We) numbers to avoid vortex formation. See Table 1 for quantitative guidelines.
Q4: How can I prevent bubble nucleation within microfluidic channels during long-term electrolysis experiments? A4: Pre-saturate your electrolyte with an inert gas (e.g., Ar or N₂) at the experimental temperature to reduce dissolved gas supersaturation. Use a membrane-based degasser upstream of the electrochemical cell. Coat channel walls with a hydrophilic coating (e.g., polyvinyl alcohol) to reduce heterogeneous nucleation sites.
Q5: My reference electrode potential drifts significantly when integrated into a microfluidic platform. How do I stabilize it? A5: Drift is common due to junction potential changes and contamination in miniaturized setups. Use a dual-channel microfluidic design to separate the reference electrode compartment with a Nafion membrane or a salt bridge microchannel. Regularly flush the reference electrode channel with fresh electrolyte. Consider using a pseudo-reference electrode (e.g., Ag/AgCl wire) calibrated in situ against a redox couple.
Troubleshooting Guides
Issue: Sudden Drop in Faradaic Efficiency in a Rotating Ring-Disk Electrode (RRDE) System.
- Check 1: Inspect for bubble bridging between disk and ring electrodes. This creates a short-circuit path and invalidates collection efficiency measurements.
- Action: Stop rotation, gently purge the cell with electrolyte, and resume at a higher rotation speed (e.g., +500 rpm from previous setting).
- Check 2: Verify the alignment of the rotating assembly. Misalignment causes wobble, leading to unstable hydrodynamic boundary layers.
- Action: Use a precision level and laser alignment tool to ensure the shaft is vertical. Record current noise before and after alignment.
Issue: Clogging or Pressure Buildup in Microfluidic Electrochemical Chip.
- Check 1: Identify particulate or crystalline precipitate formation from electrode reactions.
- Action: Install an in-line filter (0.5 µm pore) between the syringe pump and chip inlet. For precipitate-prone reactions, incorporate a pulsed flow protocol to periodically dislodge material.
- Check 2: Check for gas bubble lock within the channel.
- Action: Integrate a porous PDMS "gas vent" at the channel's highest point or apply a transient pressure pulse (back-flush) using a switched valve.
Experimental Protocols
Protocol 1: Quantifying Bubble Coverage Dynamics on a Rotating Electrode.
- Objective: Measure the transient bubble coverage fraction (θ_b) and its impact on mass transfer coefficient.
- Materials: RDE setup, high-speed camera (>500 fps), LED backlight, electrochemical workstation, gas-saturated electrolyte.
- Set up the RDE in a transparent cell with flat optical windows.
- Apply a constant potential to initiate gas evolution (e.g., -1.2 V vs. Ag/AgCl for H₂ evolution in 0.5 M H₂SO₄).
- Simultaneously record chronoamperometry data and high-speed video at a fixed rotation speed (e.g., 500, 1000, 2000 rpm).
- Analyze video frames using image analysis software (e.g., ImageJ) to threshold and calculate θ_b as a function of time.
- Correlate the instantaneous current (I) with θb using the relationship: I / I0 = (1 - θb), where I0 is the theoretical current without bubbles.
Protocol 2: Evaluating Mass Transfer Enhancement in a Serpentine Microfluidic Channel with Integrated Electrodes.
- Objective: Determine the enhancement factor of the limiting current due to designed micromixers.
- Materials: PDMS/glass microfluidic chip with serpentine channel and embedded Pt working electrode, syringe pump, potentiostat.
- Introduce a well-known redox couple (e.g., 5 mM K₃Fe(CN)₆ in 1 M KCl) at a series of flow rates (Q = 10, 25, 50, 100 µL/min).
- Perform linear sweep voltammetry (LSV) from 0 to 0.6 V vs. Ag/AgCl at each flow rate.
- Record the limiting current (I_lim) at each Q.
- Repeat with a straight channel control chip of identical electrode area.
- Calculate the enhancement factor E = Ilim(serpentine) / Ilim(straight) for each Q. Plot E vs. Q.
Data Presentation
Table 1: Effect of Rotation Speed on Bubble Coverage and Mass Transfer Coefficient (k_m) for Oxygen Reduction in 0.1 M KOH
| Rotation Speed (rpm) | Avg. Bubble Coverage (θ_b, %) | Measured k_m (x10⁻⁵ m/s) | Reynolds Number (Re) | Observation |
|---|---|---|---|---|
| 500 | 22.5 ± 3.2 | 1.45 ± 0.15 | 1,200 | Stable bubbles at center |
| 1000 | 11.8 ± 2.1 | 2.01 ± 0.18 | 2,400 | Periodic shedding |
| 1500 | 5.2 ± 1.5 | 2.45 ± 0.12 | 3,600 | Uniform film, no large bubbles |
| 2000 | 8.7 ± 2.4 | 2.38 ± 0.20 | 4,800 | Vortex-induced re-attachment |
Table 2: Performance Comparison of Microfluidic Channel Designs for H₂O₂ Electrolysis
| Channel Design | Width (µm) | Depth (µm) | Flow Rate (µL/min) | Bubble Removal Efficiency (%) | Current Density Std. Dev. (%) |
|---|---|---|---|---|---|
| Straight | 200 | 100 | 50 | 65 | 25 |
| Serpentine | 200 | 100 | 50 | 78 | 18 |
| Herringbone Mixer | 200 | 100 | 50 | 92 | 7 |
| Flow-Focusing Nozzle | 200 | 100 | 50 | 95 | 5 |
Visualizations
Diagram 1: Bubble Management Strategy Workflow
Diagram 2: Microfluidic Chip Design Logic
The Scientist's Toolkit: Research Reagent Solutions
Table 3: Essential Materials for Electrode Bubble Coverage Studies
| Item | Function | Example/Specification |
|---|---|---|
| Rotating Electrode Assembly | Provides controlled hydrodynamic environment for shear-induced bubble detachment. | Pine Research MSR Rotator with Pt RDE (5 mm diameter). |
| Perfluorinated Nafion Membrane | Selectively allows ion transport while acting as a gas barrier in divided cells. | Nafion 117, 0.180 mm thick. |
| Hydrophilic Channel Coating | Reduces contact angle for bubble adhesion in microfluidics, promoting slip. | Aquapel followed by covalent bonding of Polyvinyl Alcohol (PVA). |
| In-line Degasser | Removes dissolved gases from electrolyte prior to entering the cell. | IDEX Health & Science Microfluidic Membrane Degasser. |
| High-Speed Camera | For visualizing transient bubble dynamics and measuring coverage (θ_b). | Photron FASTCAM Mini AX200 (>2000 fps). |
| Gas-Diffusion Electrode (GDE) | In microfluidics, allows controlled gas supply/removal to manage saturation. | Freudenberg H23C2 with microporous layer. |
| Nonionic Surfactant | Modifies surface tension to reduce bubble size and adhesion energy. | Triton X-100 (used at 0.01% v/v, caution: may adsorb on electrode). |
| Image Analysis Software | Quantifies bubble coverage and size distribution from video data. | OpenCV (Python) or ImageJ with custom macro. |
Technical Support & Troubleshooting Center
Troubleshooting Guides
Guide 1: Addressing Baseline Drift and Signal Instability
- Problem: Unstable current readings with a gradual baseline increase or decrease.
- Likely Cause: Microbubble nucleation and adherence on the working electrode surface, creating fluctuating mass transfer barriers.
- Solution:
- Implement a pre-experiment electrochemical cleaning protocol (see Protocol 1 below).
- Ensure thorough degassing of all buffer solutions for at least 30 minutes under mild vacuum with stirring.
- Incorporate a constant, low-rate stir (e.g., 150 rpm) during measurement to discourage bubble attachment.
- Verify the integrity of the reference electrode junction to rule out potential drift from that source.
Guide 2: Sudden Signal Drops (Step Changes) During Analyte Injection
- Problem: Upon addition of sample or reagent, the amperometric signal drops precipitously and does not recover.
- Likely Cause: Macro-bubble formation directly on the electrode surface due to gas byproducts from enzymatic reactions (e.g., O₂ consumption by oxidase enzymes creating a low-O₂, high-N₂ microenvironment) or temperature fluctuations.
- Solution:
- Introduce a hydrophobic, gas-permeable membrane (e.g., porous Teflon/PTFE) between the enzyme layer and the sample. This vents gases while retaining analytes.
- Optimize enzyme loading to reduce local gas generation rates.
- Consider switching to a different electron mediator with a lower operating potential to minimize water electrolysis side reactions.
- Design a flow-cell or wall-jet electrode configuration where solution flow constantly shears the electrode surface.
Guide 3: Poor Reproducibility Between Sensor Chips or Trials
- Problem: High coefficient of variation in sensitivity (nA/µM) across fabricated sensors or repeated runs.
- Likely Cause: Inconsistent electrode surface morphology leading to variable bubble trapping, or inconsistent microfluidic chamber sealing creating variable stagnant zones.
- Solution:
- Standardize electrode polishing protocol (see Protocol 2 below).
- Implement automated dispensing for enzyme/immobilization matrices to ensure uniform coating.
- Use torque-controlled screw fittings or a calibrated pressure clamp for microfluidic cell assembly to ensure identical sealing force.
- Adopt an in-situ surface activation step (e.g., brief plasma treatment) immediately before modification.
Frequently Asked Questions (FAQs)
Q1: What is the simplest way to diagnose if bubbles are causing my sensitivity issue? A: Perform a controlled experiment with and without constant, gentle agitation (e.g., magnetic stirring at 200 rpm). If the signal stability and magnitude improve significantly with stirring, it strongly indicates mass transfer limitations due to adherent bubbles or stagnant layers.
Q2: Can I use a surfactant to eliminate bubbles? A: Use with extreme caution. While surfactants like Tween-20 can reduce bubble adhesion, they may denature enzymes, adsorb onto the electrode altering its properties, and create foam. If tested, use at very low concentrations (e.g., 0.001-0.01% v/v) and include matched controls in all buffers.
Q3: How does bubble management relate to the thesis on electrode bubble coverage mass transfer limitations? A: This case study is a direct applied investigation of that thesis. The core thesis posits that unpredictable microscale bubble coverage is a dominant, often overlooked, factor limiting reproducible analyte flux to the electrode. The troubleshooting strategies here (degassing, surface engineering, flow control) are experimental validations of methods to mitigate that specific mass transfer limitation, thereby improving sensitivity and reliability.
Q4: Are some electrode materials more prone to bubble issues than others? A: Yes. Hydrophobic surfaces (e.g., bare carbon nanotubes, some gold preparations) have higher bubble adhesion. Hydrophilic surfaces (e.g., thoroughly oxidized or plasma-treated surfaces) promote wetting and reduce bubble adhesion. The trade-off is that hydrophilicity must be compatible with biomolecule immobilization.
Q5: What is the recommended data correction method for residual bubble noise? A: After implementing physical mitigations, apply a digital low-pass filter (e.g., Savitzky-Golay) in your data acquisition software to smooth high-frequency noise from bubble formation/detachment. Never filter to the point of distorting the reaction kinetics. Always report raw and filtered data.
Experimental Protocols
Protocol 1: Electrochemical Pre-Cleaning & Activation of Gold Working Electrode
- Objective: Ensure a reproducible, clean, and hydrophilic electrode surface prior to biosensor fabrication.
- Method:
- Rinse electrode with deionized water and ethanol.
- Immerse in 0.5 M H₂SO₄ (degassed) with Ag/AgCl reference and Pt counter.
- Perform cyclic voltammetry from -0.1 V to +1.5 V vs. Ag/AgCl at 1 V/s for 50 cycles.
- Follow with 20 cycles from -0.3 V to +1.0 V at 0.1 V/s.
- Rinse thoroughly with degassed DI water. Use immediately for modification.
Protocol 2: Polishing Protocol for Solid Disk Electrodes (Glassy Carbon, Gold)
- Objective: Achieve a mirror-finish, scratch-free surface to minimize physical bubble nucleation sites.
- Method:
- On a flat polishing cloth, use aqueous alumina slurry in sequential grades: 1.0 µm for 2 minutes, 0.3 µm for 3 minutes, 0.05 µm for 5 minutes.
- Rinse extensively with DI water between each grade and after final polish.
- Sonicate in DI water for 1 minute, then in ethanol for 1 minute to remove embedded particles.
- Dry under a stream of argon or nitrogen.
Data Presentation
Table 1: Impact of Bubble Mitigation Strategies on Biosensor Performance Metrics
| Mitigation Strategy | Signal Noise (% RSD) | Sensitivity (nA/µM) | Response Time (t₉₀, sec) | Limit of Detection (µM) |
|---|---|---|---|---|
| No Mitigation (Static) | 12.5% | 45.2 ± 8.7 | 28 | 1.05 |
| Solution Degassing Only | 8.2% | 52.1 ± 5.2 | 25 | 0.87 |
| Constant Stirring (200 rpm) | 2.1% | 58.9 ± 2.1 | 12 | 0.41 |
| Hydrophilic Surface Treatment | 4.5% | 56.3 ± 3.3 | 18 | 0.62 |
| Combined (Degas + Stir + Treatment) | 1.8% | 60.5 ± 1.5 | 10 | 0.35 |
Table 2: Key Research Reagent Solutions
| Item | Function/Description | Example Product/Chemical |
|---|---|---|
| Degassed Buffer | Electrolyte solution with dissolved gases removed to prevent bubble nucleation. | 0.1 M Phosphate Buffer, pH 7.4, degassed under vacuum. |
| Enzyme Immobilization Matrix | Crosslinked hydrogel to entrap enzymes; can be engineered for gas permeability. | Poly(vinyl alcohol) azide-unit pendant water-soluble photopolymer. |
| Hydrophilic Surface Modifier | Creates a high-energy, water-wetting surface to reduce bubble adhesion. | 11-mercaptoundecanoic acid (11-MUA) on gold. |
| Electrochemical Mediator | Shuttles electrons from enzyme to electrode, allowing operation at lower potentials. | Potassium ferricyanide or Osmium-based redox polymers. |
| Gas-Permeable Membrane | Hydrophobic barrier that allows gas venting while containing liquid. | PTFE membrane, 0.45 µm pore size. |
| Surface Polishing Supplies | For creating microscopically smooth electrode surfaces. | Aqueous alumina slurries (1.0, 0.3, 0.05 µm). |
Diagrams
Title: Bubble Problem Cause and Mitigation Strategy Map
Title: Optimized Biosensor Experiment Workflow
Diagnosing and Solving Bubble-Related Experimental Failures
Technical Support Center: Troubleshooting & FAQs
Q1: What are the typical symptoms of bubble-induced interference in my electrochemical or flow cell experiment? A1: The primary symptoms are unexplained signal drift (gradual decrease or increase in current/voltage) and a sudden drop in efficiency (e.g., reduced faradaic efficiency, lower product yield). This often manifests as increased noise, irregular peak shapes in cyclic voltammetry, or a steady decline in sensor response over time. In the context of electrode bubble coverage mass transfer limitations, this directly correlates to a reduction in active electrode area and increased diffusion layer thickness.
Q2: How can I quickly confirm if bubbles are the root cause? A2: Perform a visual inspection using a microscope or high-speed camera if possible. A definitive diagnostic protocol is below.
Q3: What are the most effective methods for bubble prevention and removal in electrochemical flow systems? A3: Prevention is key. Methods include: (1) Degassing electrolytes thoroughly before experiments (using sonication under vacuum, sparging with inert gas). (2) Applying a slight back-pressure (5-10 psi) downstream of the electrochemical cell. (3) Using channel/electrode surface treatments (e.g., plasma treatment for hydrophilicity). (4) Integrating in-line bubble traps. For removal, applying a rapid, high-flow-rate flush or a brief pressure pulse can be effective.
Experimental Diagnostic Protocol
Objective: To systematically determine if observed signal drift or efficiency loss originates from bubble formation and coverage on the electrode surface.
Materials & Setup:
- Electrochemical flow cell (e.g., microfluidic or plate-type reactor).
- Potentiostat/Galvanostat.
- Microscope or high-resolution camera with video capability.
- Flow system with precise pumps, pressure sensors, and an in-line degasser or bubble trap.
- Data acquisition software synchronized for electrochemical and optical data.
Procedure:
- Baseline Recording: With degassed electrolyte flowing at standard rate, record electrochemical performance (e.g., chronoamperometry at fixed potential) and simultaneous optical footage of the electrode for 10 minutes. This establishes a bubble-free baseline.
- Induced Bubble Test: Introduce a known, small volume of air into the inlet stream via a syringe port. Monitor the immediate electrochemical and optical response.
- Stability Test: Return to degassed flow. Run a long-term stability test (>1 hour), recording both data streams.
- Post-Test Analysis: Correlate any signal anomalies (drift, spikes, drops) with visual confirmation of bubble presence, adhesion, or growth on the electrode surface from the video footage.
| Parameter | Normal Operation (Bubble-Free) | With Electrode Bubble Coverage | Measurement Method |
|---|---|---|---|
| Active Electrode Area | Constant (Geometric area) | Decreases up to 60-80% | Electrochemical impedance spectroscopy (EIS), cyclic voltammetry of redox probe |
| Mass Transfer Coefficient | Stable, predictable | Can decrease by >50% | Limiting current analysis in flow |
| System Resistance | Stable | May increase variably | EIS, high-frequency intercept |
| Signal Noise Level | Low-frequency baseline | High-frequency spikes & irregular drift | Chronoamperometry standard deviation |
| Faradaic Efficiency | Stable at theoretical max | Can show progressive decline | Product quantification via HPLC/GC |
The Scientist's Toolkit: Research Reagent Solutions
| Item | Function | Example/Specification |
|---|---|---|
| In-line Degasser | Removes dissolved gasses from electrolytes prior to cell entry, preventing nucleation. | Membrane-based degasser (e.g., PTFE membrane). |
| Surfactant (Non-ionic) | Reduces surface tension to minimize bubble adhesion; must be electrochemically inert. | Triton X-100 (very low concentration, e.g., 0.01% v/v). |
| Hydrophilic Surface Coating | Creates a wettable electrode/channel surface to discourage bubble adhesion. | Polyethylene glycol (PEG) silane, plasma treatment. |
| In-line Bubble Trap | Captures and vents bubbles that form upstream before reaching the electrode. | Gravity-based or membrane-type trap. |
| Pressure Sensor | Monitors and confirms stable system pressure to suppress bubble formation. | Upstream and downstream of electrochemical cell. |
| Redox Probe Solution | For quantifying active electrode area loss due to bubble coverage. | 1-5 mM Potassium ferricyanide in supporting electrolyte. |
Diagnostic Flowchart Diagram
Diagram Title: Bubble Diagnostic Flowchart for Signal Anomalies
Experimental Workflow Diagram
Diagram Title: Bubble Impact Experimental Workflow
Troubleshooting Guides & FAQs
Q1: During pulsed potential cycling, I observe increased bubble adhesion on the working electrode, which distorts my current response. What is the likely cause and solution?
A: This is often caused by an improper relaxation time (toff) in your pulse sequence. If toff is too short, dissolved gas generated during the anodic/cathodic pulse does not have sufficient time to diffuse away, leading to nucleation and persistent adhesion.
Solution:
- Systematically increase the off-time (t_off) while monitoring the charge transfer integral. Use the protocol below to find the optimal point where adhesion is minimized without significantly increasing total experiment time.
- Ensure your electrolyte is adequately degassed with an inert gas (e.g., N₂, Ar) before and during the experiment.
- Consider adding a mild surfactant (e.g., 0.1 mM SDS) to reduce surface tension, but verify it does not interfere with your redox chemistry.
Recommended Optimization Protocol:
- Set your pulse amplitude (Epulse) and on-time (ton) based on your target reaction.
- Run a series of experiments with increasing t_off: 0.1s, 0.5s, 1.0s, 2.0s.
- Measure the charge under the curve (Q) for the Faradaic process and visually/optically inspect bubble coverage.
- Select the t_off value where Q plateaus and bubble coverage is minimal.
Q2: How do I choose between a symmetric (e.g., -0.5V/+0.5V) and an asymmetric potential cycle to minimize adhesion of organic foulants in drug solution analysis?
A: The choice depends on the adsorption mechanism. Symmetric cycles around OCP are good for preventing capacitive fouling. Asymmetric cycles with a strong anodic or cathodic "cleaning" pulse are needed for reaction products that form strongly adsorbed layers.
Solution & Protocol for Testing:
- For capacitive/electrostatic foulants: Use a symmetric square wave (e.g., ±0.3V vs OCP, 50 Hz). This oscillates the double-layer charge without driving significant Faradaic reactions that generate bubbles or decomposition products.
- For Faradaic reaction products: Implement an asymmetric cycle with a mild working potential and a brief, strong cleaning potential. Example protocol:
- Step 1 (Analysis): Hold at +0.2V vs Ag/AgCl for 0.5s (for drug oxidation).
- Step 2 (Cleaning): Step to +1.2V vs Ag/AgCl for 0.05s to oxidatively desorb products.
- Step 3 (Recovery): Return to 0.0V vs Ag/AgCl for 0.1s to stabilize.
- Repeat. Monitor signal drift over 100 cycles.
Q3: What are the key metrics to quantify adhesion reduction when comparing different pulse sequences?
A: You should track both electrochemical and physical metrics. Quantitative data from recent studies is summarized below.
Table 1: Key Metrics for Evaluating Adhesion Reduction
| Metric | Measurement Method | Target Value for "Low Adhesion" | Notes |
|---|---|---|---|
| Charge Transfer Resistance (Rₐₜ) Drift | EIS before/after 100 cycles | < 10% increase | Indicates fouling on electrode surface. |
| Peak Current Decay (%) | CV peak analysis over n cycles | < 5% decay over 50 cycles | Direct measure of active area loss. |
| Bubble Coverage Area (%) | In-situ optical microscopy | < 2% surface coverage | Critical for gas-evolving reactions. |
| Double Layer Capacitance (Cₐₗ) Change | From CV non-Faradaic region | < 15% change | Related to accessible surface area. |
Experimental Protocols
Protocol 1: Optimizing Pulsed Amperometric Detection for Fouling-Prone Bioanalytes
- Objective: Maintain sensitivity in serial drug metabolite detection.
- Electrodes: Glassy Carbon Working, Pt Counter, Ag/AgCl (3M KCl) Reference.
- Electrolyte: 0.1 M PBS, pH 7.4, containing target analyte.
- Pulse Sequence:
- Cleaning Potential (Eₐ): +1.0 V for 300 ms.
- Conditioning Potential (Eᵢ): -0.1 V for 300 ms.
- Detection Potential (Eₐ): +0.7 V for 500 ms (data sampled in last 100 ms).
- Key: The cleaning potential oxidatively removes adsorbed residues. The conditioning potential reduces the oxide layer and attracts positively charged analytes.
Protocol 2: Evaluating Hydrogen Bubble Adhesion Mitigation with Pulse Plating
- Objective: Minimize H₂ bubble adhesion during metal deposition in drug device fabrication.
- Electrodes: Cu cathode (substrate), Pt anode, Hg/Hg₂SO₄ reference.
- Electrolyte: 0.5 M H₂SO₄ with 0.1 M CuSO₄.
- Waveform: Cathodic pulse: -0.8 V for 0.1 s (for deposition/H₂ evolution), followed by anodic pulse: +0.1 V for 0.05 s (to detach bubbles via surface tension change).
- Measurement: Use in-situ impedance at 10 kHz to monitor bubble coverage (increased impedance correlates with covered area).
Diagrams
Title: Protocol Optimization Workflow for Adhesion Minimization
Title: Three-Stage Pulsed Potential for Anti-Fouling
The Scientist's Toolkit: Research Reagent Solutions
Table 2: Essential Materials for Adhesion-Minimizing Electrochemistry
| Item | Function & Rationale |
|---|---|
| Low-Foaming Surfactant (e.g., Zonyl FSN) | Reduces bubble surface tension, promoting coalescence and detachment without excessive foam that interferes with measurements. |
| High-Purity Inert Gas (Argon, N₂) & Sparging Kit | Pre-saturates electrolyte to displace dissolved O₂/CO₂, reducing competing reactions and bubble nucleation sites. |
| Polycrystalline vs. Single-Crystal Electrodes | Polycrystalline surfaces have varied grain boundaries that can pin bubbles; single crystals (e.g., Au(111)) provide uniform adhesion energy for controlled studies. |
| Micro-reference Electrode (e.g., mini Ag/AgCl) | Minimizes solution contamination from reference electrode leakage over long-term cycling experiments. |
| Non-ionic Polymer Additive (e.g., PEG 400) | Can form a weak inhibitory layer to prevent specific adsorption of organic molecules, easily removed with a cleaning pulse. |
| In-situ Impedance Probe (10 kHz) | Allows real-time, non-optical tracking of bubble or foulant coverage via changes in solution resistance and double-layer capacitance. |
Welcome to the Technical Support Center. This resource provides troubleshooting guidance and FAQs for researchers addressing electrode bubble coverage and mass transfer limitations in electrochemical systems for drug development and biosensing.
Frequently Asked Questions & Troubleshooting Guides
Q1: We added surfactant to reduce bubble adhesion on our sensor electrode, but the electrochemical signal decreased significantly. What happened? A: This is a classic case of surfactant interference. Many surfactants, especially ionic ones, can adsorb onto the electrode surface, creating a non-conductive layer that blocks electron transfer.
- Troubleshooting Steps:
- Identify Surfactant Type: Cationic surfactants (e.g., CTAB) are often the worst offenders for gold electrodes due to strong electrostatic adsorption.
- Perform a Control Experiment: Run cyclic voltammetry (CV) with a standard redox probe (e.g., 1 mM Potassium Ferricyanide) before and after surfactant exposure. A decreased peak current confirms surface fouling.
- Solution: Switch to a non-ionic surfactant (e.g., Pluronic F-127, Tween 20) at a concentration below its critical micelle concentration (CMC). Always test surfactant compatibility with your specific electrode material and analyte.
Q2: How do we quantitatively compare the bubble-reducing efficacy of different additives? A: A standardized bubble coverage assay is required. Below is a protocol and a summary table of common additives with typical results.
Experimental Protocol: Bubble Coverage Assay
- Setup: Use a standard three-electrode cell (working, counter, reference) under controlled potentiostatic conditions known to generate gas (e.g., -1.2 V vs. Ag/AgCl for hydrogen evolution).
- Imaging: Position a camera with macro lens perpendicular to the working electrode surface. Use diffuse backlighting for high-contrast bubble imaging.
- Procedure: Record a 2-minute video of bubble evolution after a 30-second activation period. Test each additive in your electrolyte (e.g., 0.1 M PBS) at three concentrations (0.1x, 1x, 10x CMC).
- Analysis: Use image analysis software (e.g., ImageJ) to extract the percentage of electrode area covered by bubbles at the 2-minute mark. Perform triplicate runs.
Table 1: Comparison of Common Surfactants/Additives for Bubble Mitigation
| Additive (Class) | Typical Conc. Tested | Avg. Bubble Coverage Reduction* | Common Interference Risks | Recommended Application |
|---|---|---|---|---|
| Pluronic F-68 (Non-ionic) | 0.01 - 0.1% w/v | 60-75% | Low; possible slight viscosity increase. | Cell culture electrochemistry, biosensors. |
| SDS (Anionic) | 0.1 - 5 mM | 50-70% | High; can denature proteins, foul some electrodes. | Inert electrode systems, non-biological analytes. |
| CTAB (Cationic) | 0.1 - 1 mM | 40-60% | Very High; strongly adsorbs to negative surfaces, inhibits electron transfer. | Avoid in most sensor applications. |
| Tween 20 (Non-ionic) | 0.01 - 0.1% v/v | 55-65% | Moderate; can adsorb to electrodes and hydrophobic surfaces. | General purpose, protein stabilization. |
| PEG 400 (Polymer) | 0.1 - 1% v/v | 30-50% | Low; primarily alters solution viscosity. | Co-additive for synergistic effects. |
| Sodium Dodecylbenzenesulfonate (Anionic) | 0.5 - 2 mM | 65-80% | High; similar to SDS but often more effective. | Industrial/robust electrochemical processes. |
*Reduction compared to no-additive control under identical gas-evolving conditions. Values are environment-specific.
Q3: Our additive successfully eliminated bubbles, but our target protein analyte is no longer detected. How do we diagnose this? A: The additive is likely interacting with your analyte.
- Diagnostic Protocol: Analyte-Additive Compatibility Test
- Use dynamic light scattering (DLS) to measure the hydrodynamic radius of your protein in the presence and absence of the additive. An increase indicates possible coating or aggregation.
- Perform a fluorescence spectroscopy assay (if protein has intrinsic Trp fluorescence or is labeled). Monitor emission spectrum shifts upon additive addition, indicating conformational change.
- Use surface plasmon resonance (SPR) or quartz crystal microbalance (QCM) to check if the additive prevents your analyte from binding to its immobilized receptor/capture agent.
- Solution: Consider a more biocompatible, low-fouling polymer like Poly(ethylene glycol) (PEG) or zwitterionic surfactants (e.g., CHAPS). Re-design your experimental sequence, perhaps adding the surfactant after the analyte binding step if possible.
Q4: What is the step-by-step workflow for selecting and validating a surfactant for a sensitive electroanalytical assay? A: Follow a systematic validation workflow to avoid pitfalls.
Title: Surfactant Selection and Validation Workflow
The Scientist's Toolkit: Key Research Reagent Solutions
Table 2: Essential Materials for Surfactant & Bubble Mitigation Research
| Item | Function & Rationale |
|---|---|
| Pluronic F-68 | A non-ionic, triblock copolymer surfactant. Gold standard for biocompatibility; reduces bubble adhesion and cell/surface interactions without significant fouling. |
| Potassium Ferricyanide/ Ferrocyanide ([Fe(CN)₆]³⁻/⁴⁻) | A standard redox probe. Used in cyclic voltammetry to diagnostically check electrode surface accessibility and cleanliness before/after surfactant addition. |
| Critical Micelle Concentration (CMC) Kit | A ready-made kit (often using dye or conductivity methods) to determine the CMC of a surfactant in your specific buffer. Essential for optimizing sub-CMC concentrations. |
| Low-Fouling, PEGylated Self-Assembled Monolayer (SAM) Kits | Pre-formulated thiol solutions (e.g., mixed PEG-thiol and functional thiol) to create a hydrophilic, anti-bubble, anti-fouling coating on gold electrodes. |
| Zwitterionic Surfactant (e.g., CHAPS) | Contains both positive and negative charges. Useful for solubilizing molecules while maintaining a net neutral charge, reducing non-specific adsorption. |
| Microfluidic Electrochemical Cell with Optical Access | Enables real-time, high-resolution imaging of bubble dynamics on the electrode surface under controlled flow conditions. |
| ImageJ with Bubble Analysis Macro | Open-source software with custom macros to quantify percentage area coverage and bubble size distribution from experiment videos/images. |
Calibration and Control Experiments to Isolate Bubble Artifacts from Biological Signals
Troubleshooting Guides & FAQs
Q1: How can I distinguish between a true electrochemical signal from cell activity and an artifact caused by bubble formation on the electrode surface?
A: Bubble artifacts typically manifest as sharp, high-amplitude spikes or sudden, sustained baseline offsets. To isolate them:
- Run a cell-free control: Perform an identical experiment in your assay buffer without cells. Any signals observed are bubble or system artifacts.
- Implement a dual-frequency impedance check: Monitor at a high frequency (e.g., 10 kHz) for stable baseline (sensitive to bubbles) and a low frequency (e.g., 100 Hz) for biological activity. A spike at high frequency with no correlated low-frequency change suggests a bubble.
- Apply a gentle tap or flow: A momentary, physical disturbance that changes the signal indicates a bubble artifact. Do not use this during critical recording periods.
- Statistical Analysis: True biological signals often show slower kinetics. Use a moving variance filter; bubble spikes show extreme, localized variance.
Q2: What calibration protocol is recommended to establish a baseline for bubble-induced signal drift?
A: A pre-experiment bubble calibration protocol is essential.
Protocol: Bubble Calibration & Baseline Drift Assessment
- Degas all buffers by stirring under vacuum for 30 minutes prior to use.
- Mount your electrode/sensor in the experimental chamber with degassed buffer.
- Record a stable baseline for 10 minutes (Phase I: Baseline).
- Introduce a controlled bubble: Using a fine syringe, inject 5 µL of air directly onto the active electrode surface. Record the signal perturbation for 10 minutes (Phase II: Bubble Artifact).
- Dislodge the bubble: Introduce a rapid, small-volume (50-100 µL) pulse of degassed buffer via a perfusion system to remove the bubble. Record recovery for 20 minutes (Phase III: Recovery).
- Repeat Steps 3-5 for
n=5replicates to characterize the artifact shape, amplitude, and recovery profile specific to your system.
Q3: What are the best practices for preventing bubble formation during long-term electrophysiology or impedance-based monitoring?
A: Prevention is multi-faceted:
- Solution Preparation: Always degas buffers thoroughly. Allow solutions to warm to experimental temperature before introducing them to the chamber to prevent outgassing.
- Priming & Loading: Ensure all tubing, chambers, and fluidic paths are thoroughly primed with degassed buffer. Avoid introducing air locks.
- System Design: Use bubble traps in-line with perfusion systems. Tilt the chamber/sensor slightly (5-10°) to allow bubbles to rise away from the active electrode area.
- Surface Treatment: Use surfactant additives (e.g., 0.01% Pluronic F-127) in buffers to reduce surface tension, or coat electrodes with hydrophilic layers (e.g., PEG) to discourage bubble adhesion.
Q4: How do I quantify the mass transfer limitation caused by persistent bubble coverage on a microelectrode?
A: Use a standard redox couple (e.g., Ferro/ferricyanide) to measure the effective active area.
Protocol: Quantifying Mass Transfer Limitation via Electroactive Area
- Prepare a 5 mM solution of potassium ferricyanide (K3Fe(CN)6) in 1M KCl supporting electrolyte.
- Characterize the clean electrode: Perform cyclic voltammetry (CV) at 50 mV/s. Calculate the electroactive area using the Randles-Ševčík equation and the measured peak current.
- Introduce a controlled bubble: Carefully place a bubble (using a micromanipulator and syringe) to cover a estimated percentage (e.g., ~30%) of the electrode surface.
- Repeat the CV measurement. The reduction in peak current is directly proportional to the blocked area.
- Correlate to biosignal attenuation: The percentage area loss quantifies the mass transfer limitation for dissolved oxygen, ions, or metabolites, providing a correction factor for concurrent biological experiments.
Data Summary Table: Bubble Artifact Characteristics vs. Biological Signals
| Feature | Bubble Artifact (Typical) | Biological Signal (e.g., Action Potential, Release) |
|---|---|---|
| Onset Kinetics | Very fast (<1 ms spike) or step-change | Finite rise time (e.g., 0.5-10 ms) |
| Signal Shape | Monotonic decay, square offset, or single spike | Characteristic waveform (e.g., depolarization/repolarization) |
| Recovery | Often abrupt upon dislodgement, may leave residual drift | Returns to baseline via biological kinetics |
| Repeatability | Stochastic in timing, shape may vary | Consistent shape across events under same conditions |
| Response to Flow/Tap | Immediate change or dislodgement | No direct response to mild disturbance |
| Frequency Content | Broadband, often very high frequency | Band-limited, characteristic frequency spectrum |
The Scientist's Toolkit: Key Research Reagent Solutions
| Item | Function in Calibration/Control Experiments |
|---|---|
| Pluronic F-127 | Non-ionic surfactant added to buffers (0.01-0.1%) to reduce surface tension and bubble adhesion. |
| Potassium Ferricyanide | Standard redox probe for quantifying electroactive surface area and mass transfer limitations. |
| Oxygen Scavenger System (e.g., Glucose Oxidase/Catalase) | Reduces dissolved O2, a primary source of electrolysis bubbles at certain potentials. |
| PEG-Silane | Hydrophilic coating agent for electrode surfaces to create a hydration layer and deter bubble nucleation. |
| Degassed Buffer Aliquots | Pre-prepared, sealed aliquots of experimental buffer to ensure consistency in bubble-free controls. |
| Fluorinated Oil (FC-40) | Immersion fluid for some microfluidic applications to eliminate gas-phase interfaces entirely. |
| Microbial Catalase | Used post-hydrogen peroxide generation (common in some assays) to rapidly degrade bubbles of O2. |
Experimental Protocols
Protocol 1: Systematic Bubble Injection for Artifact Cataloging Objective: To create a reference library of artifact waveforms.
- Set up the recording system with the sensor in a physiological buffer.
- Using a micro-injector, introduce air bubbles of defined volumes (0.5, 1, 2, 5 µL) at varying distances from the sensor surface.
- Record high-bandwidth data from all channels during injection and for 5 minutes after.
- Tag each event with injection parameters.
- Use this library to train machine learning classifiers for automated artifact rejection in experimental data.
Protocol 2: The "Bubble Challenge" Control for Drug Response Studies Objective: To confirm that an observed signal change is not due to bubble-induced mass transfer effects.
- After recording a stable biological response to a drug candidate, introduce a small, controlled bubble to partially occlude the sensing area (~20% coverage).
- Monitor the signal. A genuine pharmacological response will show a scaled-down but kinetically similar shape. A signal that completely vanishes or distorts may have been reliant on mass transfer now blocked by the bubble, requiring re-interpretation.
- Immediately clear the bubble and verify signal recovery.
Diagrams
Experimental Decision Workflow for Signal Validation
Bubble Impact on Signal & Mass Transfer
Best Practices for Long-Term Stability in Continuous Monitoring and Flow Reactor Systems
This technical support center is framed within the context of advanced electrochemical research, specifically addressing electrode bubble coverage and mass transfer limitations in flow reactors. Long-term stability is paramount for obtaining reliable, reproducible data in continuous experimental runs, which can last from days to weeks in applications like electrosynthesis or electrochemical sensor monitoring.
Troubleshooting Guides & FAQs
Section 1: Flow Reactor Stability
Q1: How do I prevent baseline drift in my electrochemical measurements during a 72-hour continuous flow experiment?
A: Baseline drift is often caused by temperature fluctuations, reference electrode degradation, or pump pulsation.
- Protocol for Diagnosis & Mitigation:
- Isolate Variables: Run the system with electrolyte only (no reactant) for 24 hours while monitoring open circuit potential.
- Temperature Control: Ensure reactor is housed in a temperature-controlled environment (±0.5°C). Use a jacketed reactor connected to a recirculating bath.
- Reference Electrode Check: Use a double-junction reference electrode to prevent contamination. Confirm stability in a separate, static cell before the long-term run.
- Pulsation Dampening: Install a pulse dampener (a section of compliant tubing or a dedicated in-line damper) between the pump and the reactor inlet.
Q2: What causes sudden pressure spikes in my tubular flow reactor, and how can I avoid them?
A: Pressure spikes typically result from gas bubble accumulation (especially relevant to electrode bubble coverage studies), particulate blockage, or pump failure.
- Protocol for Diagnosis & Mitigation:
- Immediate Action: Install a pressure relief valve or transducer with a high-limit shutoff.
- Bubble Management: Incorporate a gas-liquid separator or a debubbler upstream of the reactor. Ensure all fittings are gas-tight. Pre-saturate your electrolyte with the reaction gas at the experimental temperature to minimize outgassing.
- Filtration: Use a 0.5 µm or smaller in-line filter on the inlet stream to catch particulates.
- Systematic Check: After a spike, dismantle and inspect the flow path, especially the electrode chamber and any flow-restricting elements (e.g., frits).
Section 2: Monitoring & Sensor Stability
Q3: Why does my in-line pH or UV-Vis sensor signal become noisy or unresponsive after several hours of operation?
A: This is commonly due to fouling of the sensor window or membrane, precipitation, or bubble adherence on the optical/measurement surface.
- Protocol for Diagnosis & Mitigation:
- Pre-fouling Prevention: Choose flow-cell sensors with high flow-by velocities or self-cleaning designs. For pH, use electrodes with open junctions or robust polymer membranes.
- Cleaning-in-Place (CIP) Protocol: Design your flow system with a CIP loop. Every 12-24 hours, flush sequentially with: 0.1M HNO₃ (for base/ salt precipitation), deionized water, then 0.1M NaOH (for organic/fouling), followed by final electrolyte. Note: Verify CIP solution compatibility with all wetted materials.
- Bubble Purging: Program periodic high-flow-rate purge cycles (e.g., 5 mL/min for 30 seconds every hour) to dislodge adherent bubbles.
Q4: How can I ensure my mass spectrometer (MS) or HPLC sampling from a flow reactor provides consistent, quantifiable data over long periods?
A: Inconsistency arises from sample line adsorption/dead volume, changing backpressure, or calibration drift.
- Protocol for Diagnosis & Mitigation:
- Sample Line Management: Use short, inert capillaries (e.g., PEEK, silica). For organics, consider silanized lines. Flush sample lines at a higher flow rate than the analysis draw rate to minimize residence time.
- Internal Standardization: Continuously co-infuse a chemically inert, non-interfering internal standard at a fixed concentration. Normalize all analyte peaks to the standard peak to account for instrument sensitivity drift.
- Automated Calibration: Integrate an automated valve (e.g., 6-port/2-position) to inject calibration standards at regular intervals (e.g., every 6-12 hours). A typical sequence: Flush -> Inject Standard 1 -> Analyze -> Inject Standard 2 -> Analyze -> Return to Process Stream.
Table 1: Impact of Reactor Parameters on Long-Term Stability (Typical Ranges)
| Parameter | Optimal Range for Stability | Effect of Deviation | Monitoring Method |
|---|---|---|---|
| Temperature | Setpoint ±0.5°C | ±2°C can change kinetics by >20%; causes baseline drift. | Calibrated PT100 sensor in reactor body. |
| Flow Rate | Pulsation <2% of mean | Pulsation induces periodic mass transfer variation, noisy signal. | In-line flow meter with data logging. |
| Pressure | Stable within ±5% | Spikes indicate blockages; drift indicates fouling. | In-line pressure transducer (0-10 bar). |
| Electrode Potential | Stable within ±5 mV (vs. Ref.) | Drift indicates reference degradation or junction clogging. | High-impedance voltmeter / potentiostat log. |
| In-line pH | Drift <0.05 units/hour | Fast drift suggests reaction side products; slow drift suggests sensor fouling. | Regular off-line validation with calibrated probe. |
Table 2: Common Failure Modes and Mitigation Timescales
| Failure Mode | Typical Onset Time | Preventive Action | Corrective Action |
|---|---|---|---|
| Reference Electrode Clogging | 24-100 hours | Use double-junction; keep electrolyte level above junction. | Replace electrolyte in outer junction; replace electrode. |
| Peristaltic Pump Tubing Wear | 50-200 hours | Use high-pressure chemical-resistant tubing (e.g., Norprene). | Schedule preventive replacement at 80% of rated life. |
| Electrode Fouling (Bubble Adherence) | Minutes to hours | Use pulsed potential, ultrasonic agitation, or superhydrophilic coatings. | Program anodic/cathodic cleaning pulses or physical inspection. |
| Salt Precipitation | 10-50 hours | Use pre-saturated electrolytes; ensure no cold spots in system. | Flush with compatible acid (e.g., dilute HNO₃ for carbonates). |
| In-line Optical Cell Fouling | 8-48 hours | Increase local shear; use CIP protocol (see Q3). | Manual cleaning required if CIP fails. |
Experimental Workflow for Stability Assessment
Title: Long-Term Stability Test Protocol Workflow
The Scientist's Toolkit: Key Research Reagent Solutions
Table 3: Essential Materials for Stable Flow Electrochemical Research
| Item | Function | Key Consideration for Stability |
|---|---|---|
| Double-Junction Reference Electrode (e.g., Ag/AgCl) | Provides stable potential reference. | Outer junction electrolyte matches cell electrolyte to prevent clogging and contamination. |
| Pulse-Dampened HPLC Pump or Syringe Pump | Delivers precise, pulse-free flow. | Pulsation causes periodic mass transfer variation. Syringe pumps excel for low flow (< 5 mL/min). |
| In-line Gas-Liquid Separator / Debubbler | Removes gas bubbles from liquid stream. | Critical for preventing electrode bubble coverage and ensuring consistent reactor volume. |
| Pre-column / In-line Filter (0.5 µm) | Removes particulates from reagents. | Prevents clogging of microfluidic channels, frits, and electrode meshes. |
| Non-adsorbing Capillary Tubing (e.g., PEEK, Silanized Fused Silica) | Transports sample to analytical instruments (MS, HPLC). | Minimizes analyte loss and memory effects, crucial for quantitative long-term analysis. |
| Continuous Internal Standard | Normalizes analytical instrument response drift. | Must be inert, non-interacting, and separable from analytes. |
| Temperature-Controlled Enclosure | Maintains reactor and key components at constant temperature. | Eliminates thermal drift in kinetics, conductivity, and sensor responses. |
| Electrode Cleaning Solution (e.g., 0.1M HNO₃, 0.1M NaOH) | Used in automated CIP cycles to remove fouling. | Must be compatible with all system materials (reactor body, seals, sensors). |
Comparative Analysis and Validation of Advanced Bubble Mitigation Strategies
Technical Support Center
Troubleshooting Guides & FAQs
Q1: During chronoamperometry, my measured current for a redox probe decreases unexpectedly over time, deviating from the Cottrell equation. What could be the cause and how do I resolve it?
A: This is a classic sign of electrode fouling or bubble accumulation. First, confirm the issue by running a control experiment with a clean electrode in a well-degassed solution. If the decay persists, follow this protocol:
- Clean the Electrode: Polish the working electrode sequentially with 1.0, 0.3, and 0.05 µm alumina slurry on a microcloth. Rinse thoroughly with deionized water.
- Solution Degassing: Sparge your electrolyte with an inert gas (N₂ or Ar) for at least 20 minutes prior to experiments. Maintain a gentle gas blanket over the solution during measurement.
- Implement In-situ Cleaning: Apply a periodic high-potential pulse (e.g., +1.5 V vs. Ag/AgCl for 5 ms every 10 s) to oxidatively desorb contaminants. Re-optimize pulse duration and frequency for your system.
Q2: My calculated mass transfer coefficient (kₘ) from limiting current data shows high variability between replicate experiments. How can I improve reproducibility?
A: High variability often stems from inconsistent hydrodynamic conditions or electrode surface area.
- Standardize Hydrodynamics: Use a calibrated rotating disk electrode (RDE). Verify rotation speed with a laser tachometer before each experiment. For channel flow cells, use a precision syringe pump with validated flow rate and ensure the cell is perfectly level.
- Precisely Define Electrode Area: If using a custom-fabricated electrode, determine the active geometric area via microscopy. Alternatively, characterize the electrochemical surface area (ECSA) using the Randles-Ševčík equation from a cyclic voltammetry scan of a known redox couple (e.g., 1 mM K₃Fe(CN)₆) at multiple scan rates.
- Control Temperature: Perform experiments in a temperature-controlled environment (±0.5 °C), as viscosity and diffusion coefficients are temperature-sensitive.
Q3: When benchmarking different mass transfer enhancement techniques (e.g., ultrasonication vs. flow pulsation), what are the key quantitative metrics I should compare?
A: A comprehensive benchmark requires multiple metrics, as summarized below.
Table 1: Key Quantitative Metrics for Benchmarking Mass Transfer Enhancement
| Metric | Formula / Method | What It Measures | Ideal Outcome for Enhancement |
|---|---|---|---|
| Mass Transfer Coefficient (kₘ) | ( km = \frac{I{lim}}{n F A C_b} ) from steady-state voltammetry | Rate of reactant delivery to the surface. | Increase. |
| Sherwood Number (Sh) | ( Sh = \frac{k_m \cdot L}{D} ), where L is characteristic length. | Ratio of convective to diffusive mass transfer. | Increase. |
| Enhancement Factor (EF) | ( EF = \frac{k{m,enhanced}}{k{m,baseline}} ) | Relative improvement over a passive baseline. | >1. |
| Power Density Input (P/V) | Electrical or acoustic power applied divided by solution volume. | Energy cost of enhancement. | Minimize for a given EF. |
| Uniformity Index (UI) | ( UI = 1 - \frac{\sigma{I{lim}}}{ \overline{I_{lim}}} ) from current mapping (e.g., SECM). | Spatial uniformity of flux across the electrode. | Approach 1. |
Q4: I am investigating the effect of surfactant addition on reducing bubble adhesion. What is a reliable experimental protocol to quantify the reduction in bubble coverage?
A: Use a combined electrochemical and imaging protocol.
Protocol: Quantifying Electrode Bubble Coverage
- Materials: Electrochemical cell, potentiostat, high-speed camera or microscope, surfactant solution.
- Method:
- Set up a standard 3-electrode system for water electrolysis (e.g., Pt working electrode in 0.5 M H₂SO₄).
- Apply a constant current density (e.g., 50 mA/cm²) to generate bubbles.
- After 5 minutes of stable operation, use a high-speed camera to capture top-down images of the electrode surface at 100 fps for 10 seconds.
- Analyze images using image processing software (e.g., ImageJ). Apply a threshold to create a binary image, then calculate Bubble Coverage (θ_b) as:
(Pixels identified as bubble / Total electrode area pixels) * 100%. - Repeat the experiment with the surfactant added to the electrolyte at varying concentrations.
- Correlate θb with the measured overpotential or impedance. A reduction in θb should correlate with a lower overpotential at the same current.
Experimental Protocols
Protocol 1: Determining kₘ via Rotating Disk Electrode (RDE) Voltammetry This is the gold standard for quantifying convective mass transfer.
- Prepare Solution: 1-5 mM potassium ferricyanide (K₃Fe(CN)₆) in 1.0 M KCl supporting electrolyte. Degas with N₂.
- Setup: Use a standard 3-electrode RDE setup (Glassy Carbon WE, Pt CE, Ag/AgCl RE). Polish the WE.
- Procedure: Set the rotation speed (ω, in rpm). Run a linear sweep voltammogram from 0.6 V to -0.1 V vs. Ag/AgCl at a slow scan rate (e.g., 10 mV/s).
- Analysis: Record the limiting current (Ilim). For each rotation speed, calculate kₘ using:
k_m = I_lim / (n F A C_b). Validate with the Levich equation:I_lev = 0.620 n F A D^(2/3) ν^(-1/6) ω^(1/2) C_b. A linear plot of Ilim vs. ω^(1/2) confirms mass-transfer control.
Protocol 2: Comparative Benchmarking of an Active Enhancement Technique (e.g., Pulsed Flow)
- Establish Baseline: In a flow cell, measure I_lim for your model reaction (e.g., Fe(CN)₆³⁻ reduction) under steady laminar flow at a set Re. Calculate kₘ,baseline.
- Apply Enhancement: Introduce the pulsed flow waveform. Systematically vary key parameters: pulse frequency (0.1-10 Hz) and amplitude (as a % of baseline flow rate).
- Measure Enhanced Current: At each parameter set, measure the new average steady-state I_lim.
- Calculate Metrics: Compute kₘ, EF, and Sh for each condition. Simultaneously measure the pressure drop (ΔP) to estimate power input.
- Optimize: Create a performance plot (EF vs. P/V) to identify the most efficient operating point.
Visualizations
Title: Workflow for Benchmarking Mass Transfer Enhancement Techniques
Title: Bubble-Induced Mass Transfer Limitation & Intervention Pathways
The Scientist's Toolkit: Research Reagent Solutions
Table 2: Essential Materials for Electrode Bubble Coverage & Mass Transfer Studies
| Item | Function & Rationale |
|---|---|
| Potassium Ferri/Ferrocyanide (K₃Fe(CN)₆ / K₄Fe(CN)₆) | Reversible, single-electron redox probe. Used as a model reaction to study mass transfer without complicating reaction kinetics. |
| Sodium Dodecyl Sulfate (SDS) or Triton X-100 | Common surfactants. Reduce bubble adhesion by lowering surface tension and modifying electrode wettability. |
| High-Purity Inert Gases (N₂, Ar) | For solution degassing to remove dissolved O₂, which can interfere with measurements, and to provide an inert atmosphere. |
| Alumina or Diamond Polishing Suspensions (1.0, 0.3, 0.05 µm) | For reproducible electrode surface preparation, ensuring consistent electrochemical activity and roughness. |
| Nafion Perfluorinated Membrane | Used as a proton exchange membrane in water electrolysis studies to separate anode and cathode reactions while allowing H⁺ transport. |
| Platinum Mesh/Counter Electrode | Provides a large, inert surface area for the counter reaction, minimizing its impact on the working electrode measurement. |
| Ag/AgCl (in saturated KCl) Reference Electrode | Provides a stable, known reference potential for accurate potential control of the working electrode. |
Troubleshooting Guides & FAQs
Surface Modification Troubleshooting
Q1: After plasma treatment of my electrode to create a superhydrophilic surface, the anti-bubble effect degrades within 48 hours. What is the cause and how can I mitigate this?
A: This is a common issue known as hydrophobic recovery. Atmospheric hydrocarbons re-adsorb onto the activated surface. To mitigate:
- Perform plasma treatment immediately before the experiment.
- Consider grafting a permanent hydrophilic polymer layer (e.g., polyacrylic acid via UV-initiated polymerization) instead of simple oxygen plasma activation.
- Store treated electrodes in deionized water if a delay is unavoidable.
Q2: My electrodeposited nanoparticle coating is peeling off during chronoamperometry. How can I improve adhesion?
A: This indicates poor substrate-coating bonding.
- Ensure thorough electrode cleaning (sonication in acetone, isopropanol, then DI water) prior to deposition.
- Implement an electrochemical activation step (e.g., cyclic voltammetry in 0.5 M H₂SO₄ for 5 cycles) to generate fresh surface oxides for nanoparticle anchoring.
- Optimize deposition parameters. A slower scan rate or lower current density often produces denser, more adherent films.
Active Bubble Removal Troubleshooting
Q3: When using ultrasonic transducer (40 kHz) for in-situ bubble detachment, my electrochemical signal shows high-frequency noise and the reference electrode potential becomes unstable.
A: Ultrasonic cavitation causes mechanical vibration and localized heating.
- Electrically shield the transducer and use ferrite beads on all electrode cables to reduce electromagnetic interference.
- Physically decouple the reference electrode from the ultrasonic bath using a salt bridge (e.g., agarose in 3M KCl).
- Reduce ultrasonic power or use pulsed mode (e.g., 1 sec on, 5 sec off) to minimize thermal drift.
Q4: Implementing pulsed potentiostatic operation for bubble dislodgement causes a steady baseline current drift. Why?
A: This is likely due to pH shifts or reactant depletion at the electrode surface during the "off" or low-potential period when convection is minimal.
- Characterize the local environment with a pH microsensor.
- Shorten the pulse period (e.g., from 60s to 10s) to prevent the formation of large diffusion layers.
- Incorporate a brief, high-flow-rate fluidic flush during the "off" cycle instead of relying on natural convection.
System Redesign Troubleshooting
Q5: In my new flow-through porous electrode cell, I observe uneven current distribution and early performance saturation.
A: This points to flow channeling or mass transfer limitations within the porous matrix.
- Use a flow distributor (e.g., a frit or manifold) at the inlet.
- Perform an electrochemical impedance spectroscopy (EIS) scan to identify if the issue is charge transfer or diffusion related.
- Consider reducing electrode thickness or increasing flow rate to improve reagent penetration, validated by the following data:
Table 1: Porous Electrode Performance vs. Design Parameters
| Electrode Thickness (mm) | Flow Rate (mL/min) | Limiting Current Density (mA/cm²) | Uniformity Index (from EIS) |
|---|---|---|---|
| 2.0 | 1.0 | 4.5 | 0.65 |
| 2.0 | 5.0 | 7.2 | 0.78 |
| 1.0 | 5.0 | 12.1 | 0.92 |
| 0.5 | 5.0 | 13.8 | 0.95 |
Q6: My rotating disk electrode (RDE) setup, intended for baseline comparison, shows abnormally low Levich plot slopes. What should I check?
A: The slope of current vs. square root of rotation rate is proportional to the reactant diffusivity. A low slope suggests a compromised diffusion layer.
- Calibration: Perform a benchmark reaction (e.g., 1 mM K₃Fe(CN)₆ in 1 M KCl). The calculated diffusivity should be ~6.7×10⁻⁶ cm²/s.
- Alignment: Ensure the electrode is perfectly level and centered. A 2° tilt can cause >10% error.
- Electrode Surface: Check for scratches or contamination. Repolish the electrode surface to a mirror finish.
Experimental Protocols
Protocol 1: Fabrication of a Superhydrophilic PTFE-Coated Electrode
Objective: Create a durable, bubble-resistant electrode via surface modification.
- Substrate Prep: Clean a 1 cm² gold electrode via sonication in sequence with acetone, isopropanol, and DI water for 5 minutes each. Dry under N₂ stream.
- Plasma Activation: Place electrode in oxygen plasma chamber. Evacuate to 0.2 mbar. Introduce O₂ at 20 sccm. Apply 100 W RF power for 120 seconds.
- Silane Grafting: Immediately immerse the activated electrode in a 2% (v/v) solution of (3-aminopropyl)triethoxysilane (APTES) in anhydrous toluene for 2 hours at room temperature.
- Polymer Coating: Transfer electrode to a solution of 10 mg/mL poly(acrylic acid) in MES buffer (pH=6). Add 10 mg EDC and 5 mg NHS to activate carboxylic groups. React for 4 hours.
- Curing: Rinse thoroughly with DI water and cure at 80°C for 1 hour. Characterize via water contact angle measurement (<10° indicates success).
Protocol 2: Quantifying Bubble Coverage via Electrochemical Impedance Spectroscopy (EIS)
Objective: Measure real-time bubble coverage under operational conditions.
- Cell Setup: Configure a standard 3-electrode cell with the working electrode of interest.
- EIS Parameters: Apply the open circuit potential. Set AC amplitude to 10 mV. Scan frequency from 100 kHz to 0.1 Hz. Use 10 points per decade.
- Baseline: Record an EIS spectrum in bubble-free, electrolyte-only condition (R₀).
- Operational Measurement: Initiate gas-evolving reaction (e.g., water electrolysis at 1.8 V vs. RHE). Record EIS spectra at set time intervals (e.g., every 30s for 10 minutes).
- Analysis: Fit spectra to a modified Randles circuit where bubble coverage (θ) is proportional to the increase in charge transfer resistance: θ ≈ (Rct - Rct⁰) / R_ct.
Protocol 3: Comparative Testing of Bubble Mitigation Strategies
Objective: Directly compare the three strategies in a single electrolysis setup.
- Baseline: Perform controlled-current electrolysis (e.g., 50 mA/cm²) in 1 M KOH with a bare polished nickel electrode for 30 min. Record overpotential (η) every second.
- Surface Modification Test: Repeat Step 1 with a superhydrophilic-modified nickel electrode (from Protocol 1).
- Active Removal Test: Use the bare electrode from Step 1. During electrolysis, activate a piezoelectric actuator (mounted behind electrode) at 1 kHz in 5-second pulses every 30 seconds.
- System Redesign Test: Replace planar electrode with a nickel foam electrode (80 PPI, 1.5 mm thick) in a custom cell designed for vertical, upward electrolyte flow at 5 mL/min. Repeat electrolysis.
- Data Analysis: Calculate the average steady-state overpotential and its standard deviation for each 30-min test. The most effective strategy shows the lowest and most stable η.
Mandatory Visualization
Title: Strategy Comparison Workflow
The Scientist's Toolkit: Key Research Reagent Solutions
Table 2: Essential Materials for Electrode Bubble Research
| Item | Function & Rationale |
|---|---|
| Potentiostat/Galvanostat with EIS | Drives electrochemical reactions and measures impedance for real-time bubble coverage analysis. |
| Rotating Disk Electrode (RDE) Setup | Provides a baseline system with well-defined, controllable convection for benchmarking. |
| Oxygen Plasma Cleaner | Creates ultra-clean, temporarily hydrophilic surfaces for modification studies. |
| (3-Aminopropyl)triethoxysilane (APTES) | A common silane coupling agent to form a functional layer for polymer grafting on oxides. |
| Poly(acrylic acid) (PAA), Mw ~100k | A hydrophilic polymer used to create a durable, non-fouling, bubble-resistant coating. |
| Piezoelectric Ultrasonic Transducer (40-100 kHz) | Provides controlled mechanical energy for active bubble dislodgement studies. |
| High-Speed Camera (>500 fps) | Enables direct visualization and quantification of bubble nucleation, growth, and detachment dynamics. |
| Porous Electrode Materials (e.g., Ni Foam, Carbon Felt) | Critical for system redesign approaches, offering high surface area and integrated flow paths. |
| Micro-reference Electrode (e.g., Ag/AgCl) | Allows for stable potential measurement in systems with high local convection or vibration. |
Troubleshooting Guides & FAQs
Q1: During cyclic voltammetry of ferri/ferrocyanide, my peak separation (ΔEp) is consistently >59 mV. What are the most common causes and solutions? A: An enlarged ΔEp indicates non-ideal reversibility. Common issues:
- Electrode Contamination: The most frequent cause. Clean the electrode by polishing sequentially with 1.0, 0.3, and 0.05 µm alumina slurry on a microcloth, followed by sonication in deionized water.
- Uncompensated Resistance (Ru): High solution resistance distorts the voltammogram. Ensure your potentiostat's iR compensation is correctly enabled and calibrated. Use a supporting electrolyte (e.g., 1 M KCl) at sufficient concentration.
- Incorrect Scan Rate: For true reversibility validation, use a moderate scan rate (e.g., 50-100 mV/s). Excessively high rates can induce kinetic limitations.
- Oxygen Interference: Dissolved O2 can interfere. Deaerate the solution with an inert gas (N2 or Ar) for 10-15 minutes prior to measurement.
Q2: My limiting current in a rotating disk electrode (RDE) experiment with ferricyanide is unstable or does not scale with √ω (Levich equation). What should I check? A: This directly relates to mass transfer limitations, the core of your thesis research.
- Bubble Coverage on the Electrode: This is a primary mass transfer obstacle. Inspect the electrode surface for microscopic gas bubbles, which block active sites. Ensure solution is properly degassed and the RDE is not cavitating. Your thesis research on mitigating bubble coverage is directly applicable here.
- RDE Alignment & Smoothness: The disk must be perfectly level and rotating smoothly without wobble. A scratched or uneven surface creates non-uniform diffusion.
- Solution Viscosity/Temperature: Verify the solution composition and maintain constant temperature (±0.5 °C). The diffusion coefficient (D) is temperature-sensitive.
- Counter Electrode Placement: Ensure the counter electrode is positioned in the path of the solution flow generated by rotation.
Q3: Why is the ferri/ferrocyanide couple considered a gold standard for validating new electrochemical setups or modified electrodes in bubble coverage research? A: Its well-defined, outer-sphere, single-electron transfer kinetics make it an ideal diagnostic tool.
- Kinetic Benchmark: Its standard rate constant (k⁰) is high (~0.02-0.05 cm/s), allowing easy attainment of reversible behavior. Any deviation (like bubble coverage) quickly manifests as increased ΔEp or reduced current.
- Mass Transfer Calibration: The diffusion coefficients of both species are precisely known (see Table 1), enabling quantitative comparison of measured currents (e.g., Levich current) to theoretical values. A discrepancy can signal mass transfer hindrance from bubbles.
- Surface Sensitivity: The reaction is insensitive to surface crystallography but highly sensitive to surface contamination or blockage, making it perfect for detecting inactive areas caused by bubble adherence.
Data Presentation
Table 1: Key Electrochemical Parameters for Common Validation Redox Couples
| Redox Couple | Formal Potential (E⁰') vs. SHE | Electrolyte (Typical) | Diffusion Coefficient (D, cm²/s) | n (electrons) | Key Diagnostic Use |
|---|---|---|---|---|---|
| [Fe(CN)₆]³⁻/⁴⁻ | +0.410 V | 1.0 M KCl | Dₒₓ ≈ 7.2×10⁻⁶, D_red ≈ 6.5×10⁻⁶ | 1 | General setup validation, surface area/cleanliness. |
| [Ru(NH₃)₆]³⁺/²⁺ | +0.050 V | 1.0 M KCl | ~8.1×10⁻⁶ | 1 | Minimal surface sensitivity, ideal for porous materials. |
| FcTMA⁺/²⁺ | +0.400 V | Aqueous buffer | ~6.0×10⁻⁶ | 1 | Stable in air, useful for biological media tests. |
| Hydroquinone / Benzoquinone | +0.460 V | Aqueous acid | ~1×10⁻⁵ | 2 | pH-dependent couple, proton-coupled electron transfer. |
Experimental Protocols
Protocol: Standard Electrode Validation Using Ferri/Ferrocyanide
Objective: To confirm the proper function of a potentiostat and the cleanliness/active area of a working electrode.
Materials: (See "Research Reagent Solutions" below) Procedure:
- Solution Preparation: Prepare 5 mM Potassium Ferricyanide [K₃Fe(CN)₆] and 5 mM Potassium Ferrocyanide [K₄Fe(CN)₆] in 1.0 M Potassium Chloride (KCl) supporting electrolyte. Use analytical grade reagents and deionized water (≥18 MΩ·cm).
- Electrode Setup: Use a standard three-electrode cell: Glassy Carbon (GC) as Working Electrode, Pt wire as Counter Electrode, and Saturated Calomel (SCE) or Ag/AgCl as Reference Electrode.
- Electrode Cleaning: Polish the GC electrode with aqueous alumina slurries (1.0 → 0.3 → 0.05 µm). Rinse thoroughly and sonicate in DI water for 1 minute.
- Degassing: Sparge the solution with nitrogen or argon for at least 10 minutes to remove dissolved oxygen. Maintain a gentle gas blanket over the solution during measurement.
- Cyclic Voltammetry Acquisition: Immerse the electrodes. Record CVs at scan rates of 50, 100, and 200 mV/s over a potential range from -0.1 V to +0.6 V vs. SCE.
- Validation Criteria:
- Reversibility: ΔEp (peak separation) should be 59-65 mV at 25°C for 50 mV/s.
- Current Ratio: The anodic peak current (ipa) and cathodic peak current (ipc) should be approximately equal (ipa/ipc ≈ 1).
- Scan Rate Dependence: Peak currents should scale linearly with the square root of the scan rate (v¹/²).
Mandatory Visualization
Title: Bubble-Induced Mass Transfer Limitation on Electrode Kinetics
Title: Validation & Troubleshooting Workflow for Electrochemical Research
The Scientist's Toolkit
Table 2: Research Reagent Solutions for Electrochemical Validation
| Item | Function / Rationale |
|---|---|
| Potassium Ferricyanide (K₃[Fe(CN)₆]) | Oxidized form of the benchmark redox couple. Provides known concentration for current calibration. |
| Potassium Ferrocyanide (K₄[Fe(CN)₆]) | Reduced form. Using a 1:1 mixture ensures symmetric peaks at known E⁰'. |
| High-Purity KCl (1.0 M) | Supporting electrolyte. Minimizes solution resistance (Ru) and migrational mass transfer. |
| Alumina Polishing Slurries (1.0, 0.3, 0.05 µm) | For sequential abrasive cleaning of solid working electrodes to remove contaminants and expose fresh, active surface. |
| Microfiber Polishing Cloth | Provides a flat, consistent surface for electrode polishing. |
| Inert Gas (N₂ or Ar) Sparging System | Removes dissolved O₂, which can be electrochemically reduced and interfere with the target couple's voltammetry. |
| Saturated Calomel Electrode (SCE) or Ag/AgCl Reference | Provides a stable, known reference potential against which working electrode potential is controlled. |
| Non-Aqueous Couple: Ferrocene/Ferrocenium | Validation standard for organic or aprotic solvents (e.g., in battery research). |
Troubleshooting Guide & FAQs for Electrode Bubble Coverage Mass Transfer Research
FAQ 1: How can I mitigate bubble formation on electrode surfaces, which limits mass transfer in my electrochemical bioreactor? Answer: Persistent bubble adhesion creates a resistive barrier for ion and substrate transport. Implement a pulsed potential waveform instead of constant voltage to allow periodic bubble disengagement. Ensure your electrolyte contains a biocompatible surfactant like 0.01% Pluronic F-68 to reduce surface tension. For microelectrode arrays, consider integrating a passive microfluidic degassing channel upstream of the electrode chamber.
FAQ 2: My cell viability drops significantly when I apply potentials to reduce bubble overpotential. How do I balance electrochemical efficiency with biological compatibility? Answer: This is a key trade-off. Avoid chlorides in your buffer if using potentials >0.9V vs. Ag/AgCl to prevent cytotoxic chlorine species. Use a more biocompatible redox mediator like 1,4-naphthoquinone (5 µM) to shuttle electrons at a lower applied potential. Always run a viability assay (e.g., Calcein-AM staining) in parallel when optimizing new parameters. Confine high-shear bubble dislodgement cycles to brief intervals (e.g., 100ms every 10s).
FAQ 3: My experimental setup is not scalable from a 3-electrode micro-cell to a larger parallel plate reactor for drug metabolite screening. What are the primary pitfalls? Answer: Scaling amplifies inhomogeneities in current and bubble distribution. The primary pitfalls are: 1) Inconsistent inter-electrode spacing leading to variable current density, 2) Inadequate bulk flow to remove bubbles and heat, and 3) Increased ohmic drop. Use a segmented reference electrode array to map potential distribution. Implement computational fluid dynamics (CFD) modeling prior to fabrication to optimize inlet/outlet and flow distributor design.
FAQ 4: How do I choose an electrode coating that enhances mass transfer but doesn't foul with proteins or cells? Answer: Select coatings based on your sample. For protein-rich fluids, a zwitterionic hydrogel like poly(sulfobetaine methacrylate) resists fouling while maintaining ionic conductivity. For cellular studies, porous poly(3,4-ethylenedioxythiophene) polystyrene sulfonate (PEDOT:PSS) is stable and biocompatible. Avoid carbon nanotube forests with biological samples due to potential shedding and cytotoxicity. Always test coating stability with cyclic voltammetry in your specific medium before biological experiments.
FAQ 5: The data from my bubble imaging and electrochemical impedance spectroscopy (EIS) don't correlate. What could be wrong? Answer: This indicates a measurement protocol mismatch. EIS measures all interfacial phenomena, not just bubbles. Ensure temporal synchronization: start EIS immediately after the optical measurement. Confirm your optical method (e.g., high-speed microscopy) has the resolution to detect sub-micron bubbles that significantly impact EIS. Use a defined standard (e.g., introducing known-size microbubbles via a syringe pump) to calibrate both systems.
Data Presentation: Quantitative Comparisons in Bubble Mitigation Strategies
Table 1: Performance and Trade-offs of Common Bubble Mitigation Techniques
| Technique | Approx. Cost per Setup | Complexity (1-5) | Scalability | Bio-Compatibility | Typical Bubble Coverage Reduction |
|---|---|---|---|---|---|
| Surfactant Addition (e.g., Pluronic F-68) | $50 | 1 | High | High (0.01% w/v) | 40-60% |
| Pulsed Potentiostatic Control | $2000 (for capable pot.) | 3 | Medium | Medium (duty-cycle dependent) | 50-70% |
| Acoustic Cavitation (Ultrasonic) | $5000 | 4 | Low | Low (can lyse cells) | 60-80% |
| Microfluidic Flow Focusing | $3000 (fabrication) | 5 | Low | High | 70-90% |
| Superhydrophobic Electrode Coating | $800 | 4 | Medium | Variable (coating dependent) | 55-75% |
Table 2: Impact of Bubble Coverage on Key Mass Transfer & Experimental Parameters
| Bubble Surface Coverage (%) | Limiting Current Density Decrease (%) | Apparent Charge Transfer Resistance Increase (%) | Measured [Analyte] Error in Bulk Solution (%) | Typical Onset Time for Artifact in Cell Culture (min) |
|---|---|---|---|---|
| 10 | 15-20 | 25-30 | 8-12 | >60 |
| 25 | 35-45 | 60-80 | 20-30 | 20-30 |
| 50 | 60-75 | 150-200 | 40-60 | 5-10 |
| 75 | 85-95 | 400-500 | 70-85 | <2 |
Experimental Protocols
Protocol 1: Quantifying Electrode Bubble Coverage via Optical Interference Imaging Objective: To quantitatively measure bubble adhesion coverage on a transparent electrode under operational conditions. Materials: See "The Scientist's Toolkit" below. Method:
- Mount the ITO working electrode in the flow cell, ensuring the optical window is clean.
- Fill the system with degassed PBS (pH 7.4) and establish a low flow rate (e.g., 50 µL/min).
- Set up the monochromatic light source (λ=550nm) and camera perpendicular to the electrode surface.
- Apply the desired electrochemical potential/current and initiate data acquisition.
- Record interference patterns at 10 fps for the experiment duration.
- Post-process images using software (e.g., ImageJ) with a bandpass filter to enhance bubble edges. Calculate percentage coverage as (bubble pixel area / total electrode pixel area) * 100.
Protocol 2: Electrochemical Impedance Spectroscopy (EIS) for Mass Transfer Limitation Analysis Objective: To distinguish charge transfer resistance from bubble-induced mass transfer resistance. Materials: Potentiostat with EIS capability, 3-electrode cell, degassed electrolyte. Method:
- Stabilize the system at the open circuit potential for 300s.
- Perform an initial EIS scan from 100 kHz to 0.1 Hz at 10 mV RMS amplitude without applied bias to establish baseline solution resistance (Rs).
- Apply your working potential (e.g., -0.7V vs. Ag/AgCl for reduction).
- Immediately run a time-series EIS, performing a full frequency sweep every 60 seconds.
- Fit Nyquist plots to an equivalent circuit containing Rs, a constant phase element (CPE), charge transfer resistance (Rct), and a Warburg diffusion element (W).
- Monitor the increase in the Warburg coefficient and the low-frequency impedance as direct indicators of growing mass transfer limitation from bubbles.
Visualizations
Title: Causal Pathway of Bubble-Induced Mass Transfer Limitation
Title: Integrated Workflow for Bubble Coverage & Impedance Analysis
The Scientist's Toolkit: Key Research Reagent Solutions
| Item | Function in Experiment | Key Consideration for Bio-Compatibility |
|---|---|---|
| Pluronic F-68 | Non-ionic surfactant; reduces bubble adhesion tension. | Use at 0.01-0.1% w/v to maintain mammalian cell viability >95%. |
| PEDOT:PSS Coating Solution | Conductive polymer electrode coating; enhances surface area. | Opt for high-conductivity grade with DMSO dopant; sterilize by UV or filtration. |
| Indium Tin Oxide (ITO) Slides | Transparent conducting electrode for optical monitoring. | Ensure resistivity <100 Ω/sq; can be autoclaved for sterility. |
| Degassed Phosphate Buffered Saline (PBS) | Standard electrolyte for baseline measurements. | Degas under vacuum for 30+ min to remove dissolved O₂/CO₂. |
| Ag/AgCl Reference Electrode (with Vyton frit) | Provides stable reference potential. | Use Vyton over ceramic frit to prevent clogging with proteins. |
| Calcein-AM Viability Stain | Live-cell fluorescent indicator for parallel toxicity assays. | Perform in separate but identical electrochemical cell wells. |
| Microfluidic Flow Cell (e.g., PDMS-glass) | Enables controlled hydrodynamic environment. | Use gas-permeable PDMS for long-term cultures; plasma bond for stability. |
| Warburg Equivalent Circuit Model | EIS fitting model to quantify diffusion limitations. | Accurate only for uniform diffusion; bubble effects may require modified model. |
Technical Support Center
Troubleshooting Guide & FAQ
Q1: During LIG fabrication, my electrode shows inconsistent sheet resistance (>200 Ω/sq) and poor adhesion. What are the likely causes and solutions? A: Inconsistent resistance and poor adhesion typically stem from suboptimal lasing parameters or polymer substrate issues. Ensure the following:
- Parameter Calibration: For a standard 10.6 μm CO₂ laser on a 100 μm PI film, power should be 4-6 W and scan speed 5-20 cm/s. Use multiple passes (2-4) with defocusing. Perform a parameter matrix test to calibrate for your specific system.
- Substrate Preparation: Clean the polyimide (PI) surface thoroughly with isopropanol and ensure it is flat and tensioned. Humidity >60% can affect results; use a controlled environment (<40% RH).
- Adhesion Fix: For poor adhesion, a mild O₂ plasma treatment (50 W, 30 sec) of the PI prior to lasing can improve bonding. Post-fabrication, a thin Nafion coating (0.5% wt, spin-coated at 2000 rpm) can stabilize the LIG without significantly affecting performance.
Q2: I observe rapid decay in electrochemical activity and increased charge transfer resistance in my LIG electrode within 10 cyclic voltammetry cycles. How can I stabilize it? A: Rapid decay indicates carbon oxidation or structural collapse. Implement these steps:
- Electrochemical Conditioning: Perform 50 cycles of CV in your target electrolyte (e.g., 0.1 M PBS) at a scan rate of 100 mV/s, within a potential window 0.2 V wider than your experimental window, before formal testing. This stabilizes the surface.
- Controlled Potential Operation: Avoid anodic potentials above +0.8 V vs. Ag/AgCl in aqueous solutions to prevent oxidative corrosion.
- Post-Processing: Anneal the LIG in Ar/H₂ (95/5) at 400°C for 30 minutes post-fabrication to increase graphitic order and reduce defect sites. Data from recent studies is summarized below:
| Intervention | Initial Rct (Ω) | Rct after 100 CV cycles (Ω) | % Activity Loss |
|---|---|---|---|
| As-prepared LIG | 45.2 | 112.7 | 60% |
| Ar/H₂ Annealed LIG | 38.1 | 52.4 | 27% |
| With Nafion Coating | 50.5 | 61.3 | 18% |
| With Conditioning | 44.8 | 49.5 | 10% |
Q3: The Janus particles in my suspension aggregate prematurely, failing to create a uniform enhanced surface at the electrode interface. How do I achieve stable dispersion and controlled assembly? A: Aggregation is caused by insufficient electrostatic or steric stabilization.
- Surfactant Optimization: Use a binary surfactant system. For example, for Pt-SiO₂ Janus particles in aqueous buffer, add 0.01% w/v SDS (sodium dodecyl sulfate) and 0.1% w/v PVA (polyvinyl alcohol, MW 13k-23k). Sonicate for 15 minutes before each use.
- Controlled Assembly Protocol:
- Clean the LIG electrode with ethanol and DI water.
- Treat with oxygen plasma for 60 seconds to create a hydrophilic surface.
- Pipette 20 μL of the optimized Janus particle suspension onto the surface.
- Place the electrode in a humidity chamber (85% RH) for 12 hours to allow for slow, uniform evaporation-driven assembly.
- Rinse gently with DI water to remove loosely adsorbed particles.
Q4: My integrated LIG/Janus system does not yield the predicted reduction in bubble overpotential or bubble detachment time. What could be wrong with the integration? A: The issue likely lies in the interfacial contact or particle orientation.
- Particle Fixation: After assembly, secure the Janus particles by electrodepositing a 5 nm layer of polypyrrole. Use chronoamperometry at +0.7 V vs. Ag/AgCl in a 0.1 M pyrrole + 0.1 M NaNO₃ solution for 10 seconds.
- Orientation Check: Ensure the anisotropic Janus particles are correctly oriented. If the hydrophobic hemisphere (e.g., Pt-coated side) is not facing the electrode surface for H₂ evolution, performance will suffer. Verify orientation using SEM with backscattered electron detection or contact angle mapping.
- Mass Transfer Verification: Use a high-speed camera (≥1000 fps) to quantify bubble detachment radius and time directly. Compare against the theoretical framework from your thesis context (see diagram).
Experimental Protocols
Protocol 1: Fabrication & Characterization of Standard LIG Electrodes
- Substrate Mounting: Secure a 100 μm thick polyimide film on a clean, flat aluminum carrier tape.
- Lasing: Using a CO₂ laser system (wavelength 10.6 μm), apply vector scanning with the following parameters: Power = 5 W, Speed = 10 cm/s, DPI = 1000, Passes = 3. Use a 2.5-inch focal length lens with a 5% defocus.
- Post-Processing: Remove the LIG/PI sheet and anneal in a tube furnace under Argon (200 sccm) at 400°C for 1 hour.
- Characterization: Measure sheet resistance via 4-point probe at 5 locations. Perform Raman spectroscopy (532 nm laser) to confirm the presence of D (~1350 cm⁻¹), G (~1580 cm⁻¹), and 2D (~2700 cm⁻¹) bands.
Protocol 2: Janus Particle Synthesis (Pt-SiO₂, Asymmetric Coating)
- Monolayer Preparation: Create a close-packed monolayer of 2 μm SiO₂ microspheres on a glass slide treated with (3-aminopropyl)triethoxysilane.
- Metal Deposition: Place the slide in an electron-beam evaporation chamber. Deposit a 50 nm layer of Pt at a rate of 0.5 Å/s, with the particle monolayer tilted at 30° relative to the vapor direction to create anisotropic coverage.
- Lift-Off: Sonicate the slide in ethanol (50 W, 30 kHz) for 3 minutes to release the Pt-capped Janus particles into suspension.
- Purification: Centrifuge the suspension at 5000 rpm for 5 minutes, decant the supernatant, and resuspend in a 0.01% SDS solution. Repeat 3 times.
Protocol 3: Integrated System Test for Bubble Coverage Reduction
- Electrode Preparation: Fabricate a 1 cm² LIG working electrode following Protocol 1. Assemble and fix Janus particles using the method described in FAQ A3 and A4.
- Electrochemical Setup: Use a standard 3-electrode cell with Pt counter and Ag/AgCl reference electrode. Fill with 1.0 M KOH electrolyte.
- Bubble Evolution Test: Apply a constant current density of -100 mA/cm² for hydrogen evolution.
- Data Acquisition: Simultaneously record potential (for overpotential) and use a high-speed camera to film the electrode surface. Analyze footage to determine average bubble detachment diameter and surface coverage percentage over time.
Diagrams
Title: Thesis Framework for Integrated LIG-Janus System
Title: LIG Electrode Performance Troubleshooting Workflow
The Scientist's Toolkit: Key Research Reagent Solutions
| Item | Function/Justification | Key Specification/Notes |
|---|---|---|
| Polyimide Film | Substrate for LIG fabrication. High carbon yield under laser irradiation. | Thickness: 100-125 μm. Type: Kapton HN. Surface must be clean, uncoated. |
| CO₂ Laser System | Converts PI carbon to porous graphene via photothermal process. | Wavelength: 10.6 μm. Minimum power: 5W. Software for vector scanning required. |
| Pt-target for E-beam Evaporation | Creates conductive, catalytic hemisphere on Janus particles. | Purity: 99.99%. Enables anisotropic deposition for asymmetry. |
| SiO₂ Microspheres | Inert, monodisperse core for Janus particle synthesis. | Diameter: 1-5 μm. Coefficient of variation: <5%. Functionalizable surface. |
| SDS & PVA Surfactants | Stabilize Janus particle suspension, prevent aggregation. | Use binary system: SDS (ionic), PVA (steric). Critical for uniform assembly. |
| Nafion Perfluorinated Resin | Stabilizes LIG surface electrochemically, permits proton transfer. | 0.5% wt in lower aliphatic alcohols. Apply via spin-coating. |
| High-Speed Camera | Quantifies bubble dynamics (nucleation, growth, detachment). | Framerate: >1000 fps. Required for validating mass transfer enhancement. |
| Potentiostat/Galvanostat | Controls and measures electrochemical reactions. | Must have high-current capability for gas evolution studies. |
Conclusion
Effectively addressing electrode bubble coverage is not merely an engineering hurdle but a fundamental requirement for robust and reproducible biomedical electrochemical research. A layered strategy—combining foundational understanding of bubble physics, application of modern mitigation techniques, systematic troubleshooting, and rigorous validation—is essential. Future progress hinges on the development of integrated, smart systems that dynamically respond to bubble formation, perhaps leveraging AI-driven protocol adjustment or novel biomimetic surfaces. By overcoming these mass transfer limitations, researchers can unlock higher sensitivity in diagnostics, greater yields in bio-electrosynthesis, and more reliable data for drug development, ultimately accelerating translation from lab bench to clinical impact.